
Shopify Guide To Managing Product Image Versions

Managing product image versions on Shopify can quickly become a mess: old photos, new lifestyle shots, UGC, seasonal variants, A/B tests… and suddenly you don’t know which image is live on what product.
In this guide, you’ll learn how to manage product image versions in Shopify like a pro—from naming conventions and version control to AI-powered workflows using Supra AI Photo Studio.
Why Product Image Version Management Matters
Your product photos are your storefront. Chaotic image management leads to:
- Inconsistent branding across collections
- Outdated or off-brand photos still showing on live product pages
- Difficulty running A/B tests on thumbnails or hero images
- Wasted time hunting for “that one better version” you edited last month
By treating images like versions of a product (rather than random uploads), you can:
- Roll out new visuals systematically
- Revert to older images quickly if performance drops
- Keep your catalog visually consistent
- Scale your store without drowning in files
1. Understand How Shopify Stores Product Images
Before managing versions, it helps to know where things live.
Where images live in Shopify
- Product images – Attached directly to each product and its variants.
- Files area – Under Content → Files in your Shopify admin.
- Theme assets – Images used in banners, sections, etc., inside your theme.
For product image versions, you mostly work in the Product page and, if you use AI tools, inside dedicated apps like Supra AI Photo Studio.
2. Create a Simple Versioning System (Naming & Structure)
You don’t need a complex DAM to manage product image versions effectively. A clear, consistent system goes a long way.
Use a consistent file naming convention
Adopt a pattern like:
product-handle_view_version-context.extension
Examples:
linen-shirt_front_v1-studio.jpglinen-shirt_front_v2-lifestyle-kitchen.jpglinen-shirt_detail_v1-cuff-closeup.jpglinen-shirt_on-model_v3-outdoor-sunset.jpg
Why this helps:
- You instantly know which image is newer (v1, v2, v3…)
- You can see where it’s used (front, back, detail, on-model)
- You capture context (studio, lifestyle, UGC, seasonal)
Tag versions inside image alt text
Alt text is mostly for accessibility and SEO, but you can discreetly include version info:
"White linen shirt on female model in outdoor setting, front view – lifestyle image v2."
This helps your team know which visual is current while still describing the image naturally.
3. Keep Versions Organized at the Product Level
Each Shopify product can store multiple images. Use that to your advantage.
Recommended image order on a product page
A simple, high-converting structure is:
- Hero image – Current primary version (best-converting, clearest view)
- Alternate angles (front/back/side)
- Lifestyle / in-context images
- On-model / try-on photos
- Detail close-ups
- UGC-style images or seasonal/secondary variants
When you upload a new version of your hero image:
- Keep older hero versions inside the same product gallery, but move them toward the end.
- Rename or re-upload with
vXso you can tell which is live.
Tip: Always check how the new hero image looks in your collection grid and on mobile. A beautiful lifestyle shot that crops badly in the grid can hurt CTR.
4. Use AI to Generate and Track New Image Versions
Manually creating new image versions (new shoots, editors, retouching) is slow and expensive. This is where AI-powered product photography changes the game.
Supra AI Photo Studio lets you create multiple professional versions of your images directly inside your Shopify admin.
What you can version with Supra AI Photo Studio
- Lifestyle vs studio: Take a plain white background shot and generate:
- Minimalist studio render
- Kitchen counter scene
- Desk setup
- Outdoor picnic scene
- On-model try-on images: Put apparel, jewelry, or accessories on realistic AI models:
- Different skin tones, body types, and poses
- Seasonal outfits and styling
- Background styles: Clean white, branded colors, luxury boutique, nature scenes, etc.
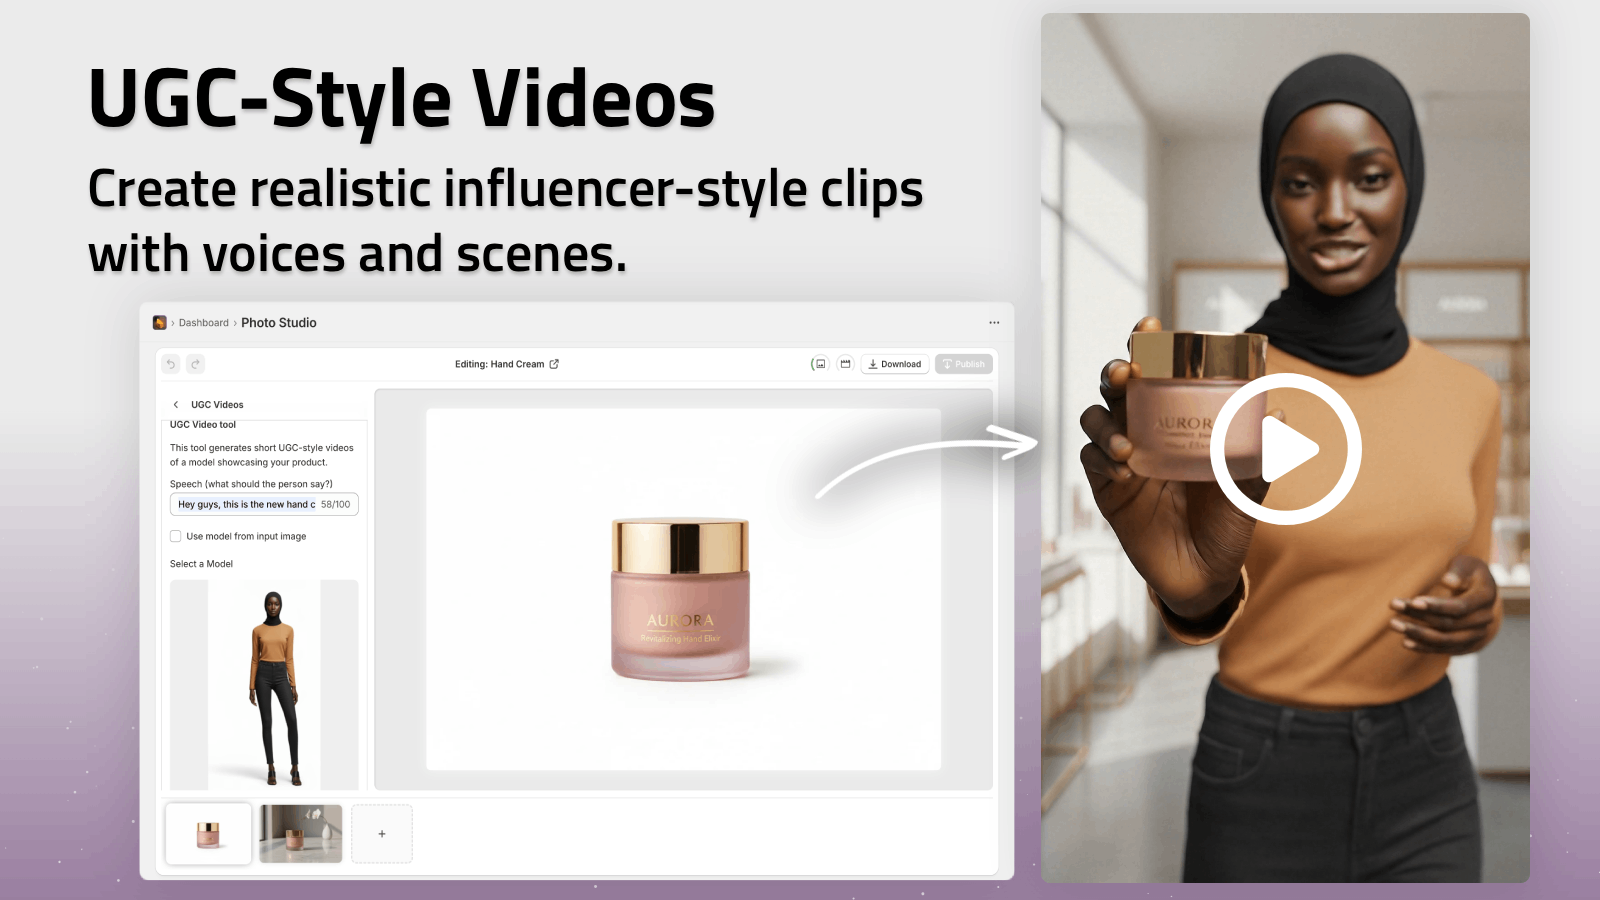
- UGC-style images & videos: More casual, influencer-like visuals to test vs polished studio shots.
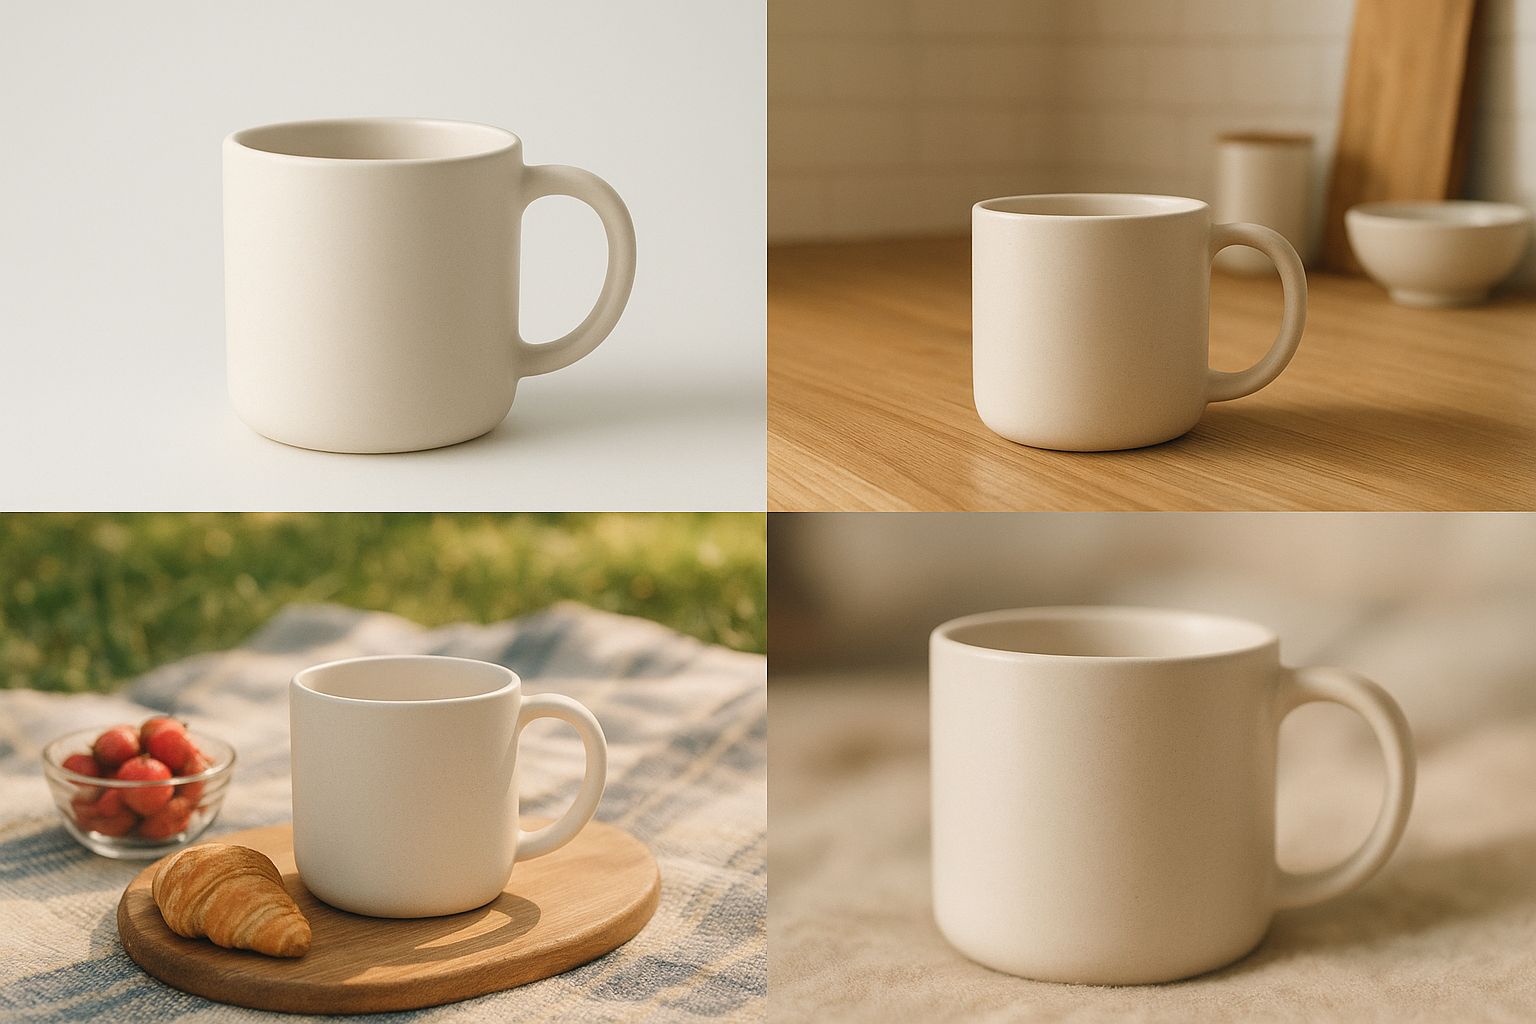
Because all of this lives within the same editor and product gallery, you can:
- Generate several image versions in minutes
- Compare them visually
- Choose which one becomes the new hero image
Try it here: Supra AI Photo Studio on the Shopify App Store.
5. Manage Image Versions Inside Supra AI Photo Studio
Supra AI Photo Studio is designed to fit into your Shopify workflow and make version control simpler.
Step-by-step workflow
-
Open the app from Shopify admin
- Choose a product or upload a new image.
-
Use the editor’s image gallery (bottom)
- This shows all images associated with the product.
- Each new AI-generated image becomes another version in this gallery.
-
Isolate product first (recommended)
- Use “Isolate Product” (background remover) to get a clean base.
- This gives more consistent results for lifestyle scenes, try-ons, and videos.
-
Create new versions with different tools
- Background replacement for new contexts (studio, boutique, outdoors).
- Object placement to drop your product into lifestyle environments.
- AI Try-On for apparel, jewelry, eyewear, and accessories.
- Auto-enhance & upscaling to create higher-quality versions of older images.
-
Compare and select winners
- Scroll through versions in the gallery.
- Publish your chosen image(s) directly back to the Shopify product with one click.
See the editor in action:
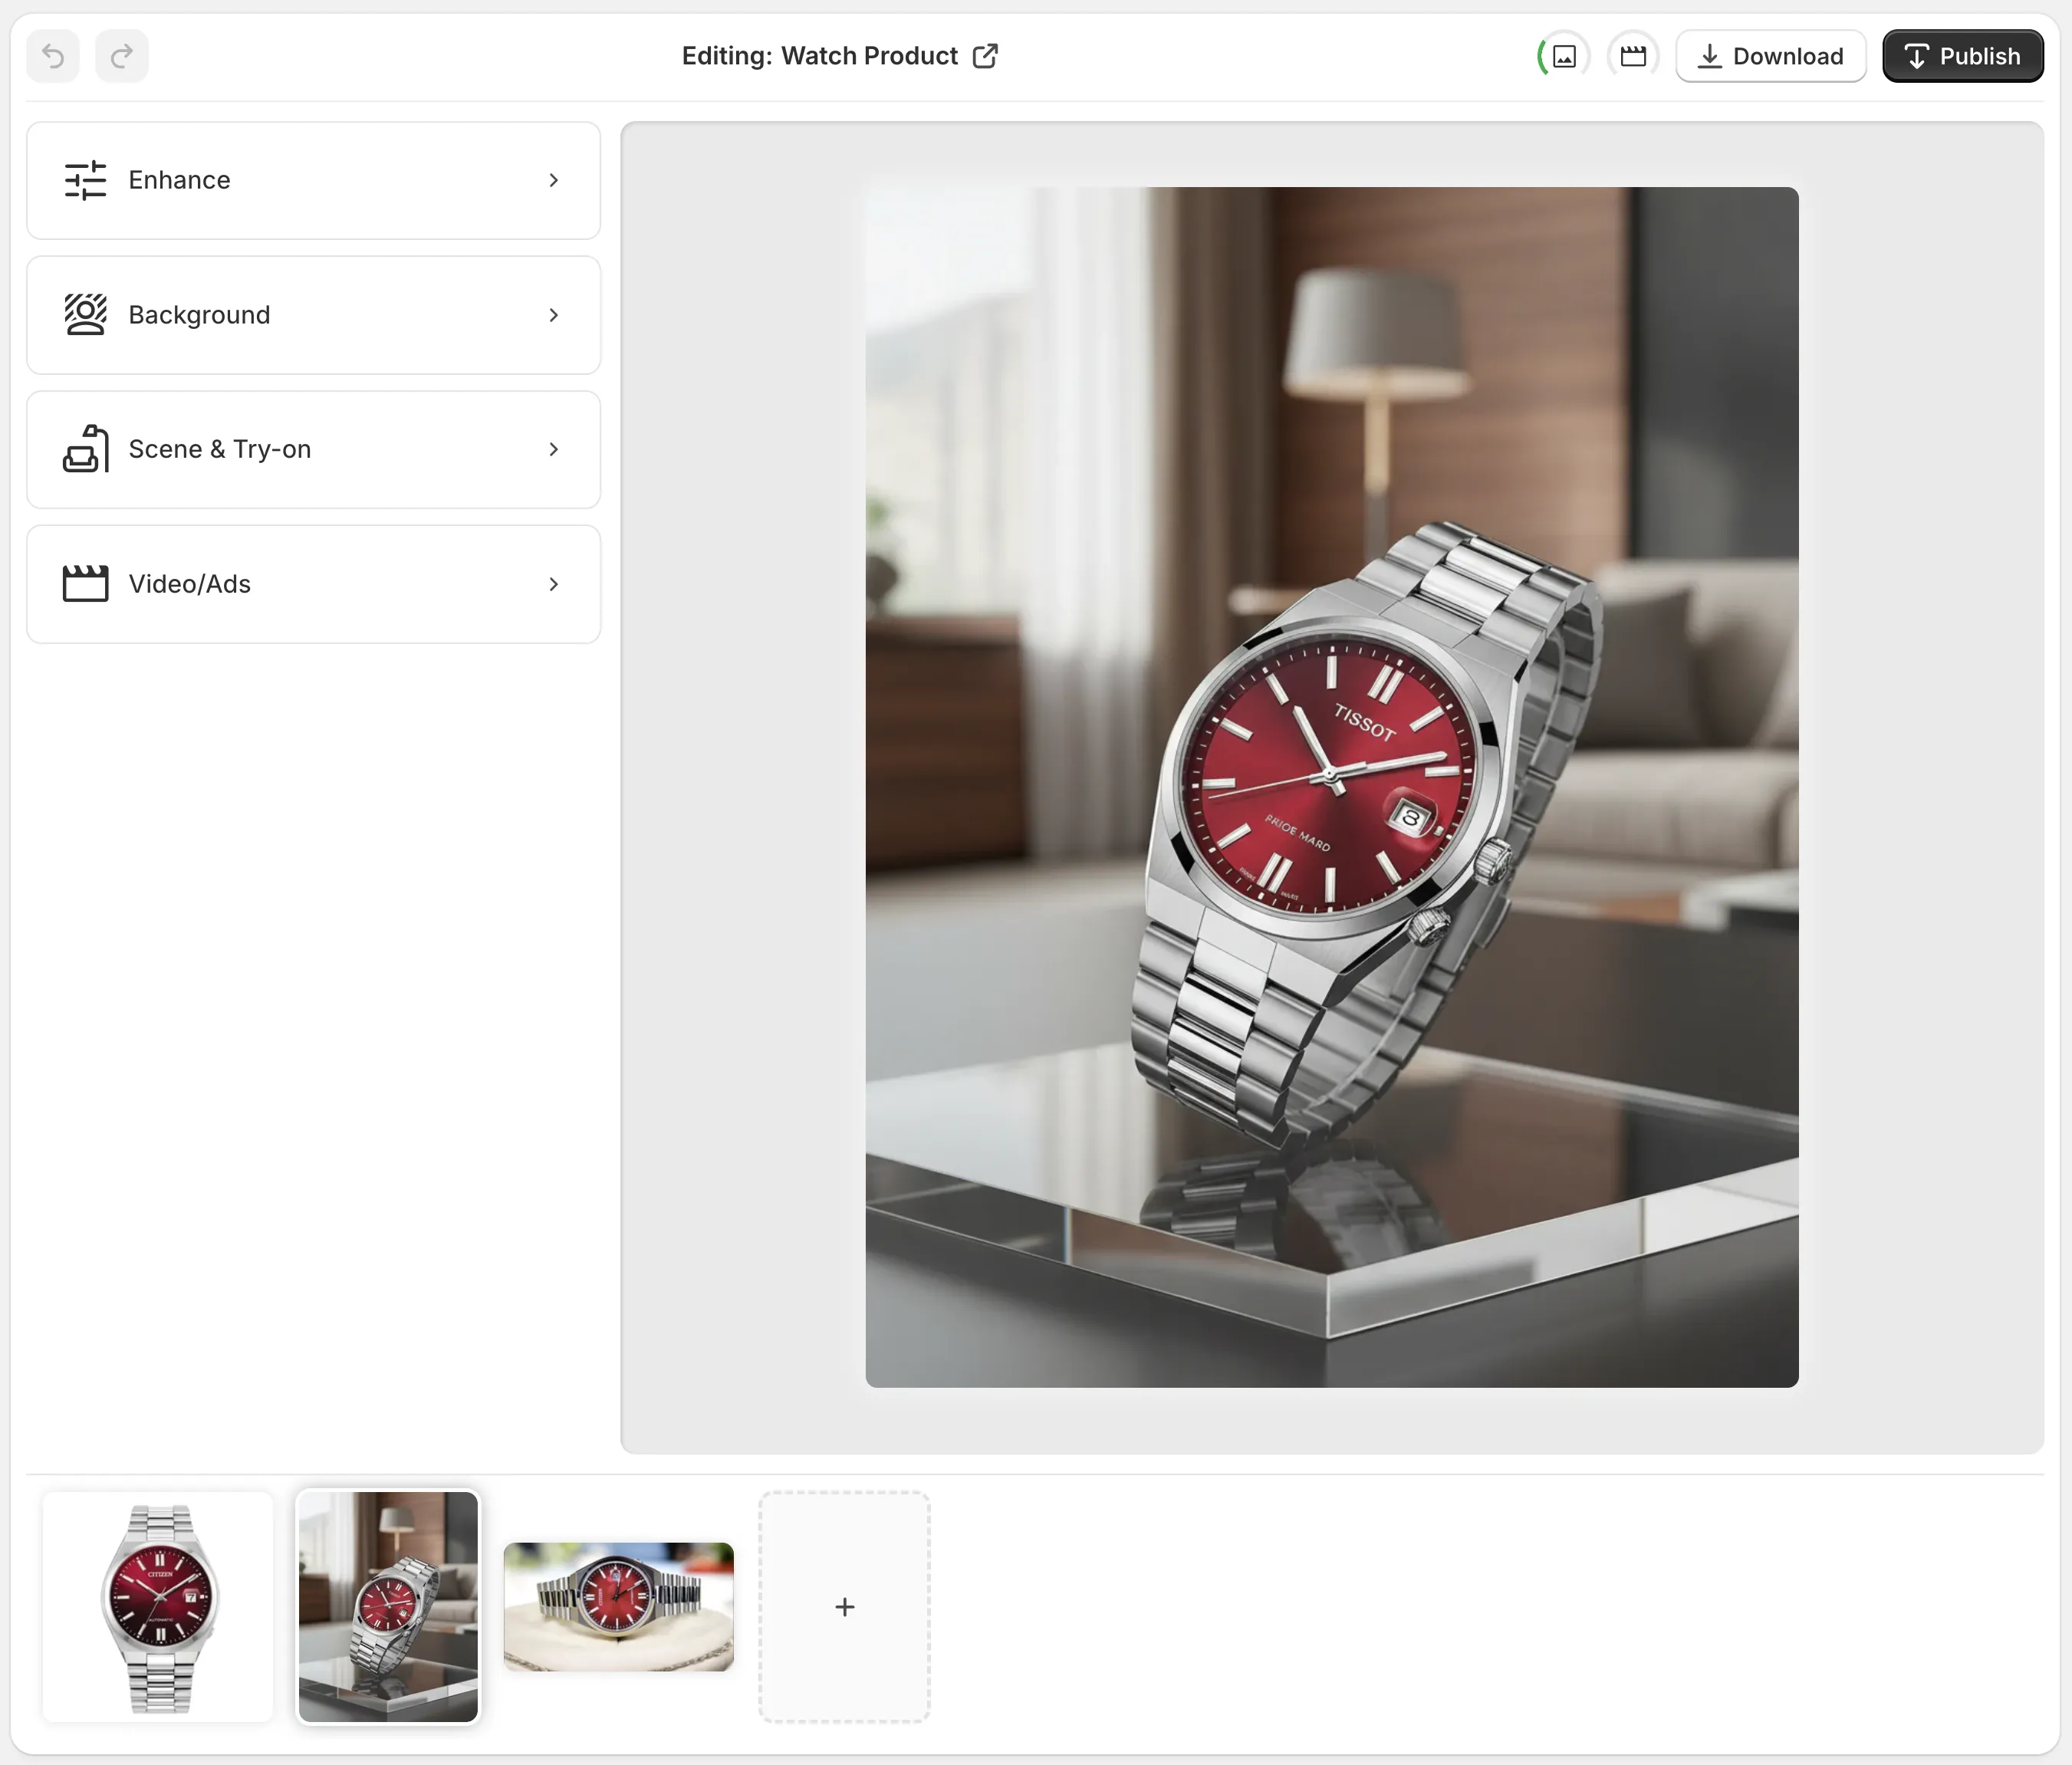
Because everything happens in-app, you avoid uploading random files named
image(32).jpgand instead keep structured, trackable versions attached to each product.
6. A/B Test Different Image Versions for Performance
Managing image versions isn’t just about organization—it’s about finding what converts best.
What you can test
- Hero: studio vs lifestyle – Does a clean white background or in-context scene drive more add-to-carts?
- With vs without model – On-model photos vs flat lays for apparel or accessories.
- Minimal vs detailed – Simple composition vs more props and storytelling.
- Static images vs UGC-style visuals – Particularly for social traffic.
Simple A/B testing workflow
- Create 2–3 main hero versions using Supra AI Photo Studio.
- Publish version A as hero for a set period (e.g., two weeks).
- Track key metrics in Shopify and your analytics tool:
- Product page view to add-to-cart rate
- Conversion rate
- Bounce rate and time on page
- Switch to version B, repeat.
- Keep the best-performing version as your new standard, but don’t delete the others—mark them clearly as older versions.
This way your version library becomes a performance history, not just an archive.
7. Avoid Common Mistakes With Product Image Versions
Even advanced stores fall into these traps:
1. Deleting old versions too aggressively
You may want to clean up, but old images are:
- Useful fallbacks if a new style underperforms
- Helpful for seasonal reuse
Instead of deleting, push them down the gallery and clearly mark them as outdated in your internal notes.
2. Mixing unedited and edited styles
If some images are crisp, color-corrected AI-enhanced shots and others are dark, phone-taken snapshots, your brand feels inconsistent.
Use Supra AI Photo Studio’s auto-enhance, denoise, deblur, and lighting correction to bring legacy images up to your current standard.
3. Ignoring video versions
Short product videos and b-roll are now standard on high-performing product pages.
With Supra AI Photo Studio you can generate:
- B-roll product drops with dust or liquid splashes
- UGC-style vertical videos from a single product shot
Treat these like image versions too: “product-handle_video_v1-broll.mp4”, etc.
8. Build a Lightweight Versioning SOP for Your Team
Even a tiny brand benefits from a clear standard operating procedure for image versions.
You can keep it to a one-page doc covering:
- Naming rules for all new product media
- Which image types every product must have
- Hero, second angle, detail, lifestyle, on-model (if relevant)
- Who decides when to update a hero image
- Based on A/B tests or seasonal changes
- How to store and track performance notes
- E.g., a simple spreadsheet or Notion table: product, version, dates live, CTR, conversion rate
- Which tools to use
- Shopify admin for upload and ordering
- Supra AI Photo Studio for creation, enhancement, and version exploration
With this in place, anyone on your team can create, test, and manage new image versions without breaking consistency.
9. Put It All Together: A Sample Workflow
Here’s how a practical, scalable workflow might look for a single product:
- Upload original product shot to Shopify.
- Open the product in Supra AI Photo Studio.
- Use Isolate Product and auto-enhance to create
v1studio hero. - Generate:
v2lifestyle kitchen scenev3on-model try-on image (for apparel/jewelry)v4UGC-style shot for social and product gallery
- Publish
v1as hero,v2–v4as supporting images. - After some traffic, test
v2as hero image vsv1. - Keep the better performer as
current-heroin your internal notes and leave older versions in the gallery for future reuse.
Repeat this process across your catalog and you’ll have structured, performance-driven image versioning instead of random uploads.
Next Step: Turn Your Existing Images Into High-Converting Versions
You don’t need to reshoot your whole catalog to get started.
Install Supra AI Photo Studio on your Shopify store and:
- Turn plain white shots into rich lifestyle images
- Generate realistic model try-ons in minutes
- Create b-roll and UGC-style videos from existing photos
- Keep all these versions neatly attached to each product inside Shopify
→ Get started here: Supra AI Photo Studio on the Shopify App Store
→ Learn more on the landing page: https://supra-ai-photo-studio.sktch.io/
With the right system and the right tools, managing Shopify product image versions becomes a growth lever—not a chore.