How To Photograph Jewelry For E‑Commerce: A Complete Step‑By‑Step Guide
Selling jewelry online is brutally competitive. If your photos are flat, blurry or inconsistent, customers will scroll past—no matter how beautiful your pieces are.
In this guide, you’ll learn exactly how to photograph jewelry for e‑commerce: from budget‑friendly setups and shooting techniques to editing workflows that make your products look studio‑grade.
Bonus: If you don’t have time (or budget) for complex photo shoots, you can instantly turn simple shots into high‑end images with Supra AI Photo Studio, an AI product photography app for Shopify.
1. Why Jewelry Photography Is So Hard (And Worth Getting Right)
Jewelry is one of the most challenging product categories to photograph:
- It’s tiny and requires macro‑level detail
- Metals are reflective and pick up everything in the room
- Gemstones need proper sparkle, color and clarity
- Customers want to see true scale and how it looks when worn
But getting it right pays off:
- Higher conversion rate on product pages
- Fewer returns (because details match expectations)
- A more premium brand feel that supports higher prices
If you combine a simple shooting setup with smart AI editing using Supra AI Photo Studio, you can get studio‑quality jewelry photos without hiring a pro.
2. Essential Gear For Jewelry Product Photography
You don’t need a full commercial studio. Start with the basics and upgrade later.
Camera & Lens
- Best: DSLR or mirrorless camera + a macro lens (50–105mm)
- Good: Modern smartphone with a good camera (iPhone / Android) and a macro/portrait mode
Tips:
- Use a longer focal length (50mm+) to avoid distortion
- Shoot at f/8–f/16 for more depth of field so the whole piece stays sharp
Tripod
A stable tripod is non‑negotiable:
- Prevents motion blur
- Allows longer exposures at low ISO
- Keeps your framing consistent for collections
Lighting
Jewelry loves soft, even light.
- Softbox or LED panel with diffuser
- Or a light tent / light box for very controlled reflections
- Avoid harsh direct light or overhead bulbs that create ugly highlights
Color temperature: stick with 5000–5600K (daylight) and turn off other room lights.
Backgrounds & Props
- White or light gray sweep (paper, foam board, acrylic)
- Neutral styling props: marble slabs, linen, ceramic dishes, wooden blocks, dried flowers
- Acrylic risers or jewelry stands for height & separation
Remember: for pure e‑commerce product images, keep it simple. Lifestyle props are best for secondary images and ads.
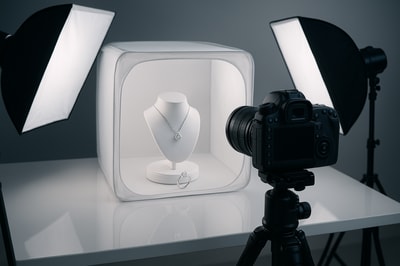
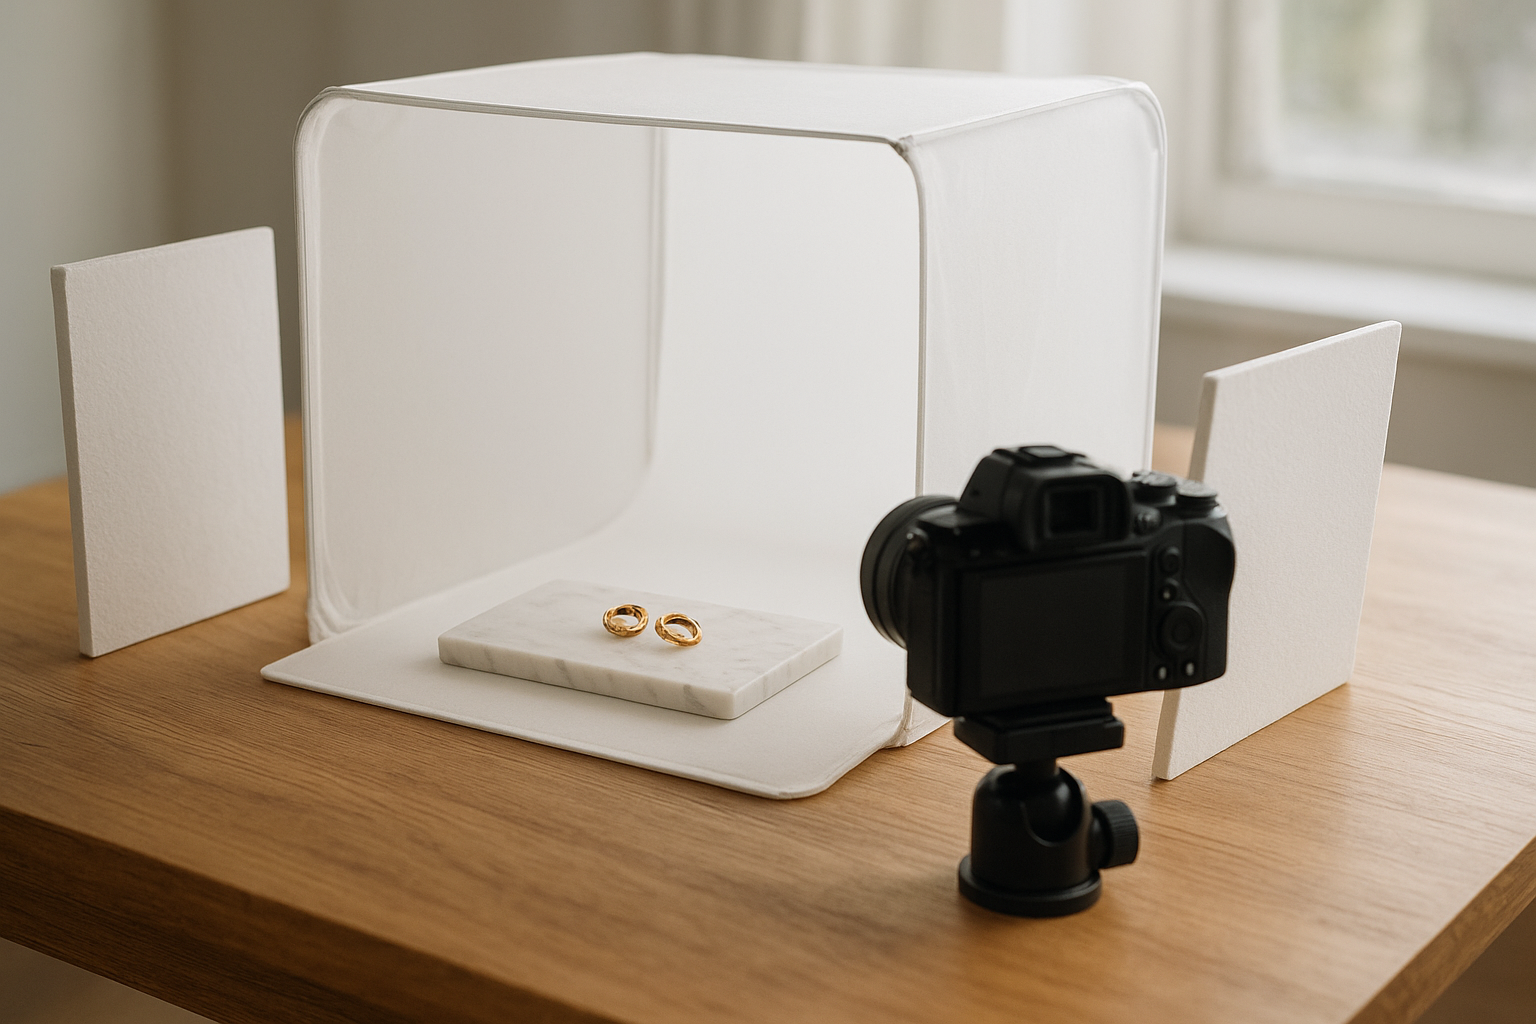
3. Build A Simple Jewelry Photography Setup
You can build a clean, repeatable setup on any table.
- Place your table near a window for natural light OR use a softbox/LED.
- Set up your backdrop sweep behind and under the jewelry.
- Put your tripod facing slightly downward at the product.
- Add white foam boards opposite the light to bounce and soften shadows.
- Place jewelry on a stand, riser or flat depending on style.
Once this is in place, you can shoot dozens of pieces in one session and later bring them to a consistent, professional look with Supra AI Photo Studio using its background remover, auto‑enhance, and upscaling tools.
4. Prepare The Jewelry (This Alone Can Double Quality)
Dust and fingerprints are more visible at macro scale than in real life.
Before shooting:
- Clean with a microfiber cloth and jewelry cleaner
- Use a blower or soft brush to remove dust
- Wear cotton gloves when handling pieces
- Check for tangled chains and bent earring posts
Take a quick test shot and zoom in 200% to catch flaws before you photograph the whole collection.
5. Camera Settings For Sharp, Detailed Jewelry Shots
Whether you’re using a camera or a phone, the principles are the same.
If You Use a DSLR / Mirrorless
- Mode: Aperture Priority (A/Av) or Manual
- Aperture: f/8–f/16 for maximum sharpness and depth
- ISO: 100–200 (to avoid noise)
- Shutter speed: Let the camera decide (tripod will handle slow speeds)
- White balance: Set to Daylight (or match your light’s Kelvin)
- Focus: Use single‑point autofocus on the most important detail (e.g., gemstone face) or manual focus with magnification
If You Use a Smartphone
- Use a tripod + remote or timer to avoid shake
- Enable Pro/Manual mode if available
- Tap to focus on the center of the piece or gemstone
- Reduce exposure slightly if highlights are blown out
- Turn off HDR if it creates halos or unnatural contrast
Remember: it’s far better to shoot slightly darker and sharp than bright and blurry. You can brighten in editing or instantly with Auto Enhance in Supra AI Photo Studio.
6. Composing Jewelry Photos For E‑Commerce
Must‑Have Angles For Every Product Page
At minimum, capture:
- Front hero shot – centered, slightly angled, shows full design clearly
- Close‑up detail – prongs, engraving, stone cut, clasps
- Side/profile view – thickness, height, setting
- Scale shot – on hand/neck/ear or next to a familiar object
- Lifestyle shot – styled scene or on a model
On Shopify, you can easily build an image gallery that flows from clean white hero to detail + lifestyle. If you only have a basic white shot, you can generate lifestyle versions, model try‑ons, and UGC‑style content directly from that image using Supra AI Photo Studio.
Framing & Cropping
- Leave consistent margins around the jewelry across your catalog
- Avoid cutting off chains, hoops or important details
- Align pairs (earrings, cufflinks) symmetrically
- Use rule of thirds for lifestyle images to keep them dynamic
7. Controlling Reflections & Sparkle
Metals and gemstones are basically tiny mirrors—so control what they see.
Minimize Ugly Reflections
- Use a light tent or build one with translucent paper to diffuse light
- Surround the jewelry with white cards/foam boards to create clean reflections
- Wear neutral clothes so you don’t appear in reflections
- Angle the piece slightly so it reflects light, not your room
Bring Out Gemstone Brilliance
- Add a small, harder light source (like a bare LED) from one direction to create sparkles while keeping the main light soft
- Slightly rotate rings/earrings until facets catch light
- Take multiple shots with small adjustments, then pick the best later
If highlights or reflections are still distracting, you can quickly fix them using the Auto Enhance and Background Replace tools in Supra AI Photo Studio rather than painstaking manual retouching.
8. Backgrounds: White, Colored, and Lifestyle
Pure E‑Commerce (Catalog) Shots
Most marketplaces and many Shopify themes work best with:
- Pure white (#ffffff) or very light gray
- Clean, shadow‑controlled surfaces
You can shoot on simple white card, then:
- Use Background Remover in Supra AI Photo Studio to isolate the jewelry
- Replace with a perfect white or branded background in seconds
Branded & Lifestyle Shots
Once you have your clean hero shot, create supporting images with more personality:
- Rings on marble slabs
- Necklaces draped over linen fabric
- Earrings on ceramic dishes or stone tiles
- Bracelets stacked on a wrist or jewelry stand
With Supra AI Photo Studio, you can skip reshooting:
- Use Object Placement to put your jewelry into luxury boutiques, vanity tables, outdoor scenes and more
- Generate mockups embedding your designs onto boxes, pouches, display cards
This lets you keep your original image but produce endless variations for ads, landing pages and social.
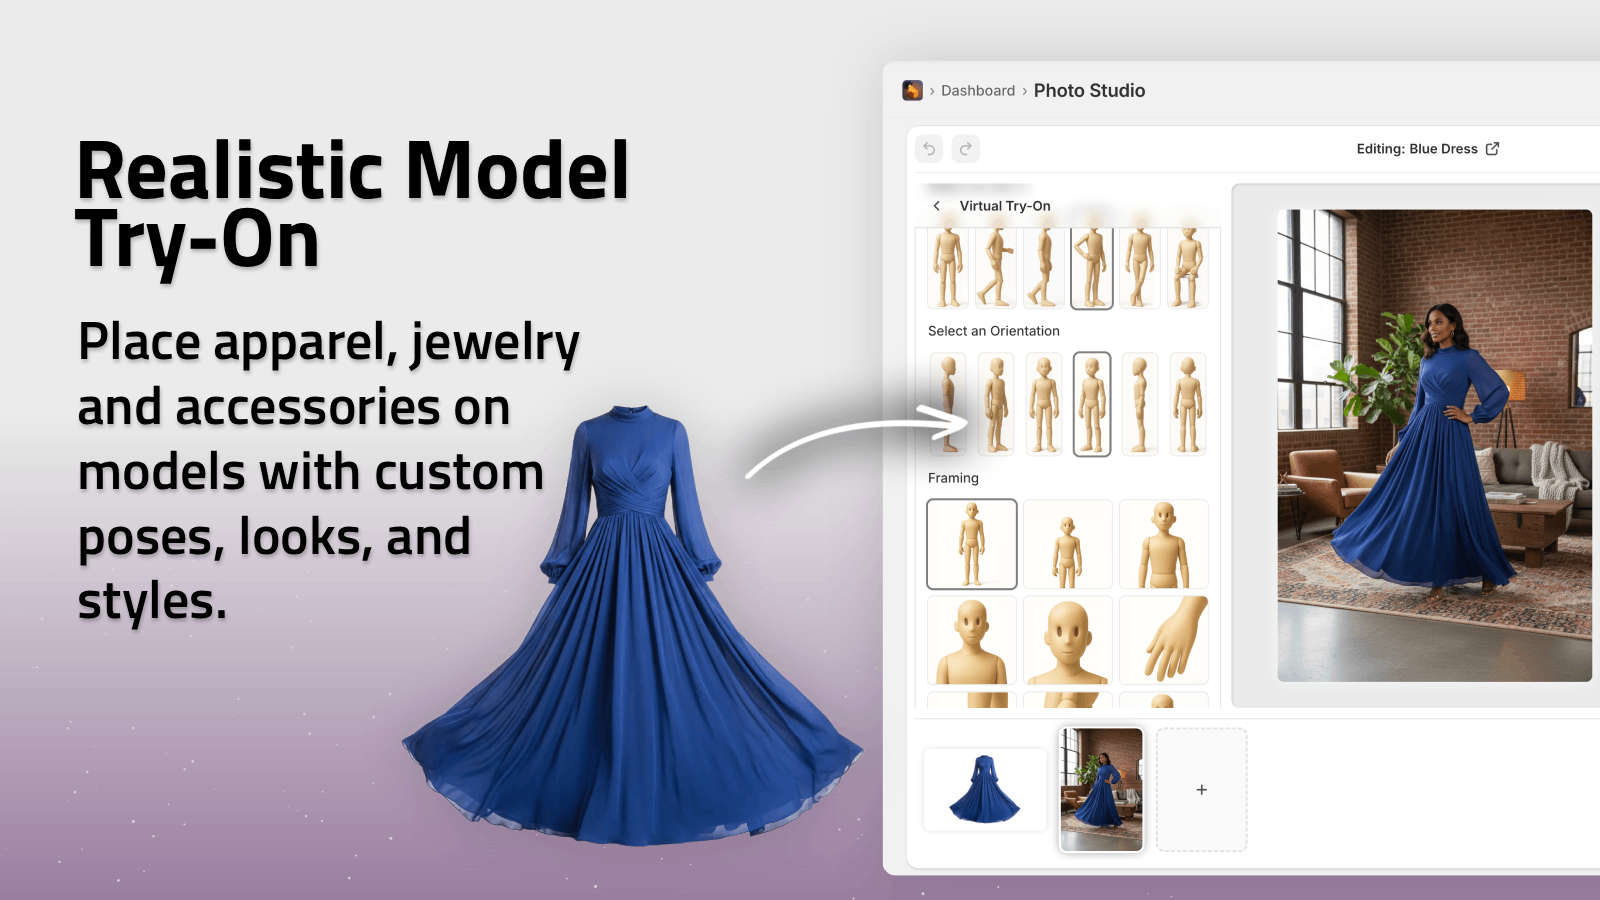
9. Showing Jewelry On Models (Without Scheduling A Shoot)
Shoppers want to know: How big is it? How does it sit on the body? On‑model images answer both.
Traditionally, you’d need:
- A model
- A stylist
- A photographer and studio
With Supra AI Photo Studio, you can instead:
- Use AI Try‑On to place your earrings, necklaces, bracelets or rings on realistic AI models
- Choose skin tone, body type, pose and vibe to match your target audience
- Maintain true product shape and details, so customers still see the real piece
This is perfect for Shopify product galleries, collection banners and ads where lifestyle context really boosts click‑through.
10. Editing & Retouching For Consistent Jewelry Photos
Editing is where your images go from good to polished. Key steps:
- Crop & straighten – make horizons level, keep consistent framing
- Adjust exposure & contrast – brighten without blowing out metal highlights
- Refine white balance – ensure gold, silver, rose gold, and gemstones look accurate
- Sharpen – especially for macro details and stone facets
- Remove dust & specks – spot removal on obvious flaws
Doing this manually for hundreds of SKUs is time‑consuming. That’s why many Shopify merchants use Supra AI Photo Studio:
- Auto Enhance fixes noise, blur, color and lighting in one click
- Upscaling turns slightly soft smartphone shots into crisp, high‑resolution images
- Background removal & replacement standardizes your entire catalog
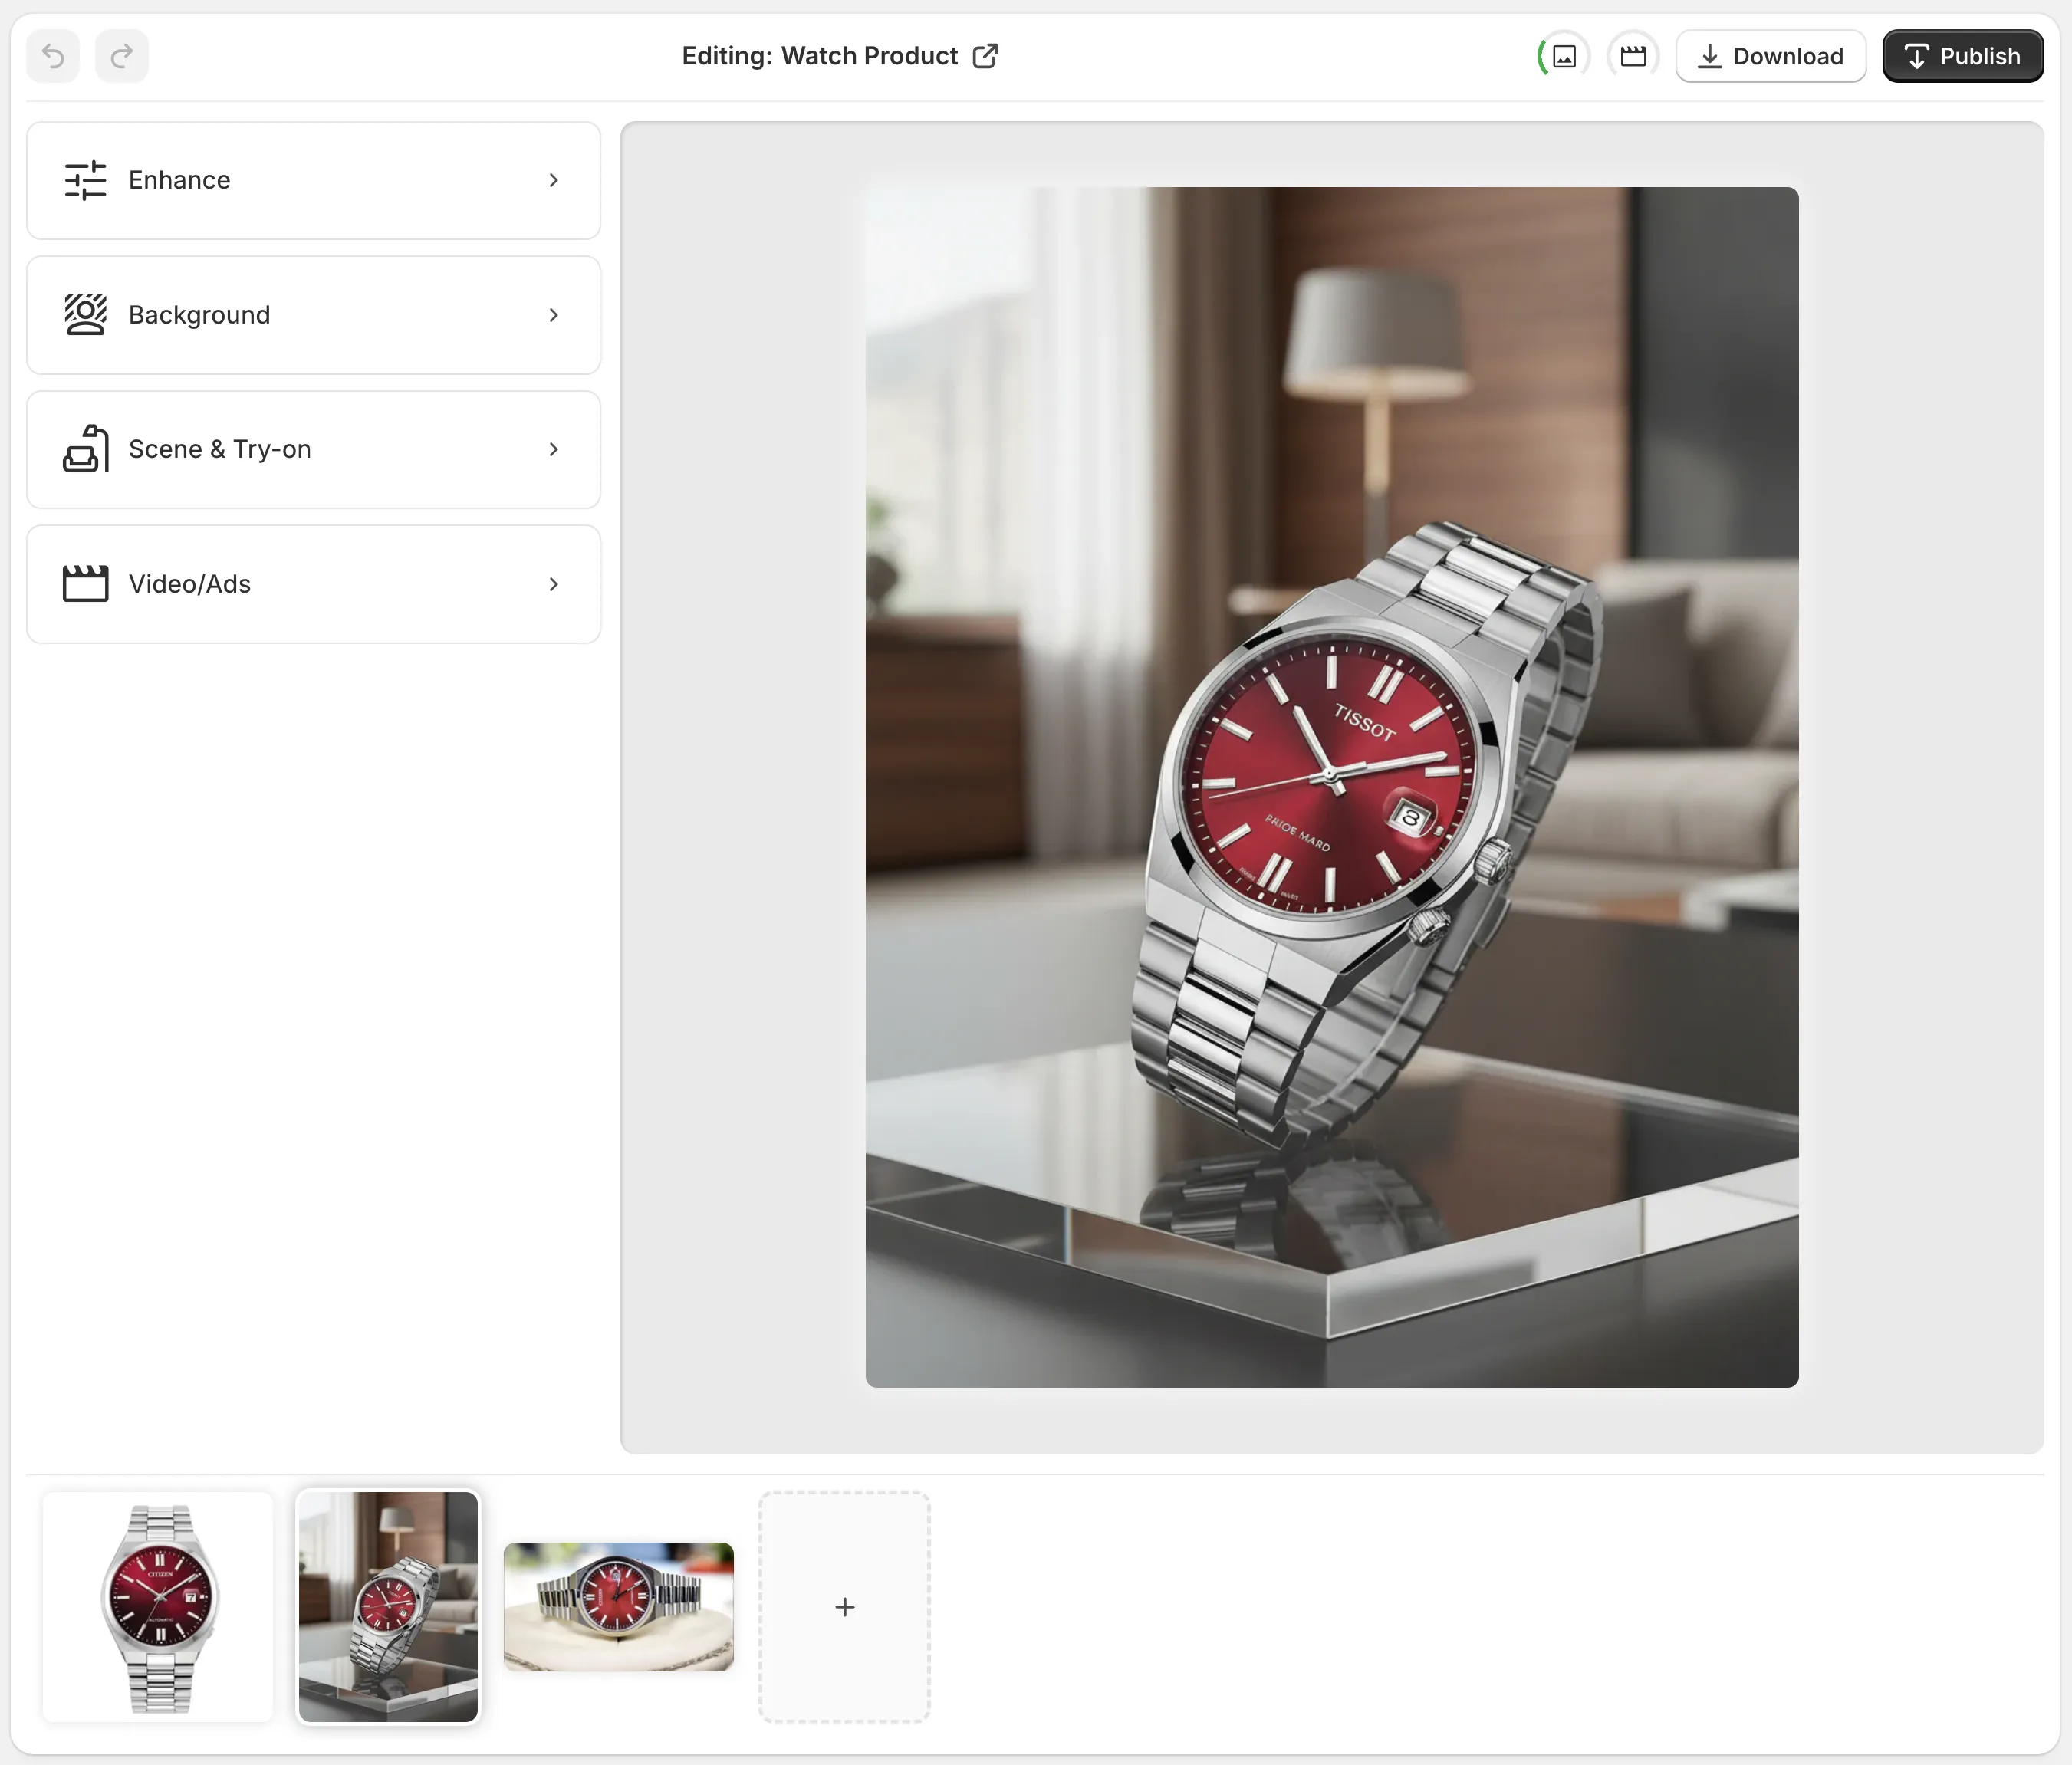
Everything happens inside your Shopify admin, synced directly with your products.
11. Turn Jewelry Photos Into High‑Converting Content
Great still images are just the start. Modern jewelry brands win with video and UGC‑style content for TikTok, Instagram, Reels and ads.
From a single product image, Supra AI Photo Studio can generate:
- B‑roll videos: slow‑motion rotations, close‑ups, cinematic product drops
- UGC‑style videos: influencer‑like clips talking about or showcasing your piece
- Mockups: designs placed on packaging, cards or pouches for branding
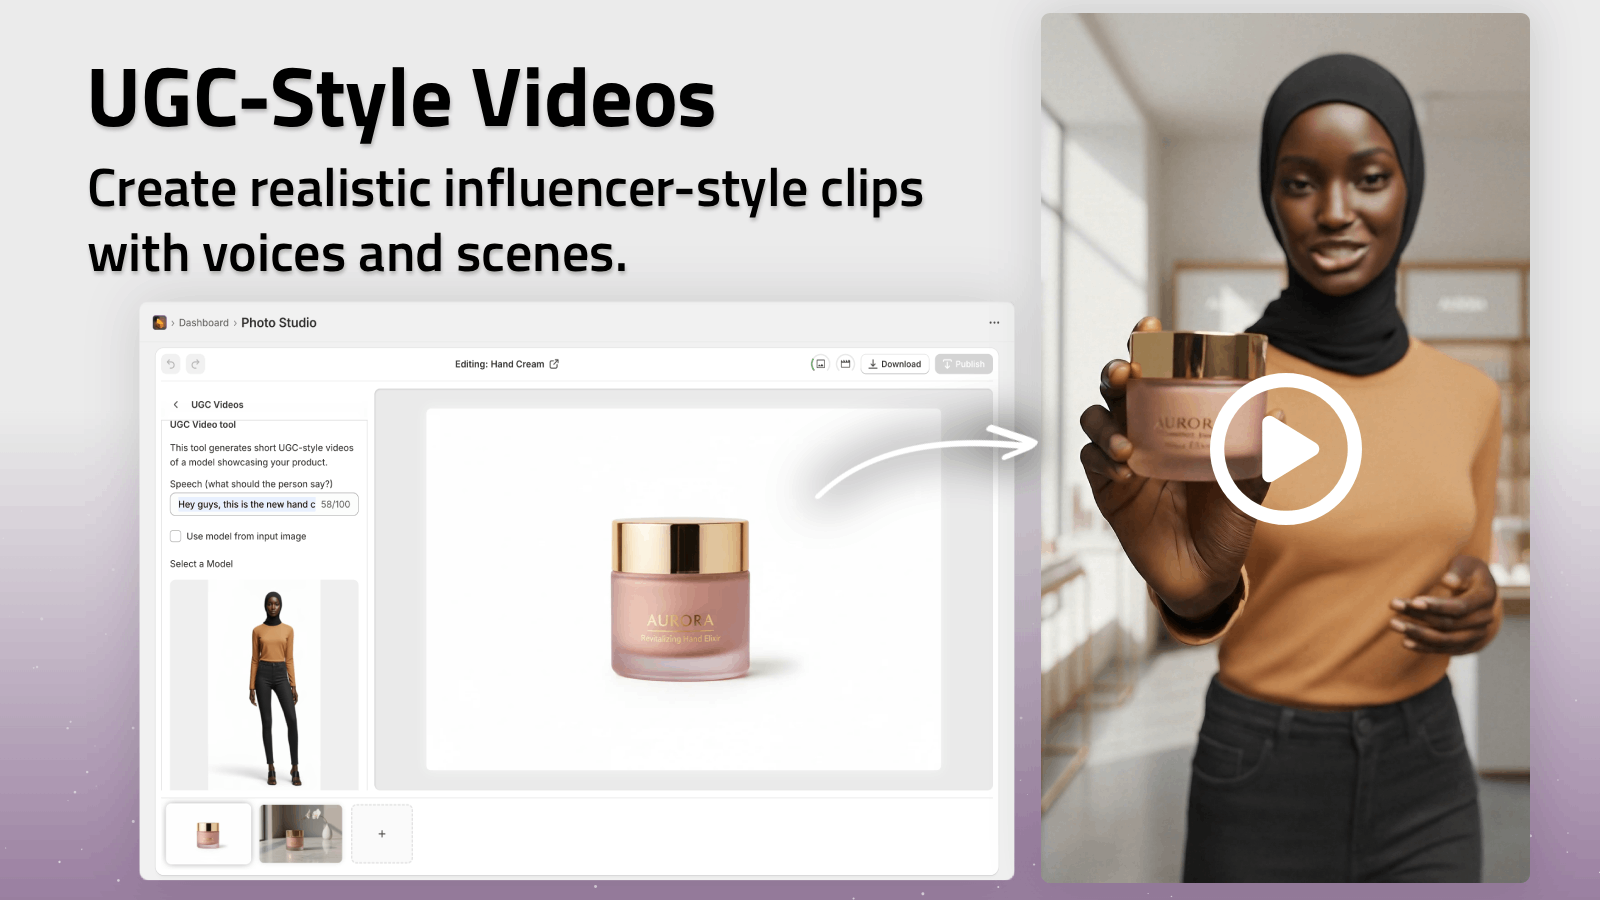
Instead of reshooting, you repurpose existing images into assets that increase engagement and conversion across your entire funnel.
12. A Simple Workflow You Can Repeat For Every Collection
Here’s a straightforward process you can adopt for all your jewelry launches:
- Plan your must‑have product angles and any lifestyle concepts
- Clean & prep each piece thoroughly
- Shoot on tripod with soft light and consistent settings
- Upload images to Shopify
- Open Supra AI Photo Studio from your Shopify admin
- Use Isolate Product and Background Remover for clean catalog shots
- Apply Auto Enhance and Upscale for crisp, bright images
- Generate Object Placement, AI Try‑On and UGC/B‑roll videos for marketing
- Publish updated images and videos directly to your product pages
Repeat this for every collection, and your store will quickly look like a high‑end jewelry brand, even if you’re a one‑person operation.
Final Thoughts
You don’t need a massive budget to photograph jewelry for e‑commerce—you need a reliable setup, consistent technique, and smart editing.
Do your best with the camera you have, then let AI handle the heavy lifting for backgrounds, enhancements, lifestyle scenes, and video.
If you’re on Shopify and want to transform your jewelry photos into high‑converting visuals in minutes, try Supra AI Photo Studio. There’s a free plan, so you can test it on a few products and see the difference for yourself.