How To Auto Enhance Product Photos For Shopify

Why Auto-Enhancing Product Photos Matters For Shopify
When shoppers land on your product page, they decide in seconds whether to trust your brand. Blurry, dark, or inconsistent images silently kill conversions and increase returns.
Auto-enhancing your product photos fixes this without hiring a designer or learning Photoshop. With AI tools like Supra AI Photo Studio, you can instantly:
- Sharpen and upscale low-res images
- Fix lighting and colors automatically
- Remove distracting backgrounds
- Create consistent, on-brand visuals across your catalog
In this guide, you’ll learn step-by-step how to auto enhance product photos for Shopify and turn "okay" images into high-converting product visuals.
What Does “Auto Enhance” Actually Do?
"Auto enhance" isn’t just one effect. Modern AI tools apply a stack of optimizations in a few seconds:
- Denoise – Removes grain and noise from low-light or smartphone shots
- Deblur / Sharpen – Recovers detail and makes edges crisp
- Color correction – Fixes white balance, so whites look white, not yellow or blue
- Contrast & exposure – Balances shadows and highlights for a professional look
- Tone & saturation – Makes colors pop while keeping them realistic
With Supra AI Photo Studio, you can run these enhancements in one click, directly inside your Shopify admin.
Step 1: Install an Auto-Enhance App for Shopify
The fastest way to auto enhance product photos is with a Shopify-native app that plugs straight into your catalog.
- Go to the Supra AI Photo Studio app listing.
- Click Add app and follow the install steps.
- Once installed, open it from your Shopify admin → Apps → Supra AI Photo Studio.
Why use Supra AI Photo Studio specifically?
- Built for Shopify merchants (no external tools or exports)
- Includes auto enhance, background remover, upscaling, try-on, object placement, and AI videos in one place
- Comes with a Free plan so you can test it on real products
Step 2: Choose the Right Source Images
Auto enhancement is powerful, but it works best when your starting point isn’t too bad. Before you upload:
- Use well-lit photos (natural daylight or softbox is ideal)
- Avoid extreme blur (completely out-of-focus shots are hard to save)
- Make sure the product fills most of the frame
Tip: For best AI results in Supra AI Photo Studio, start with images at least 1000px on the longest side.
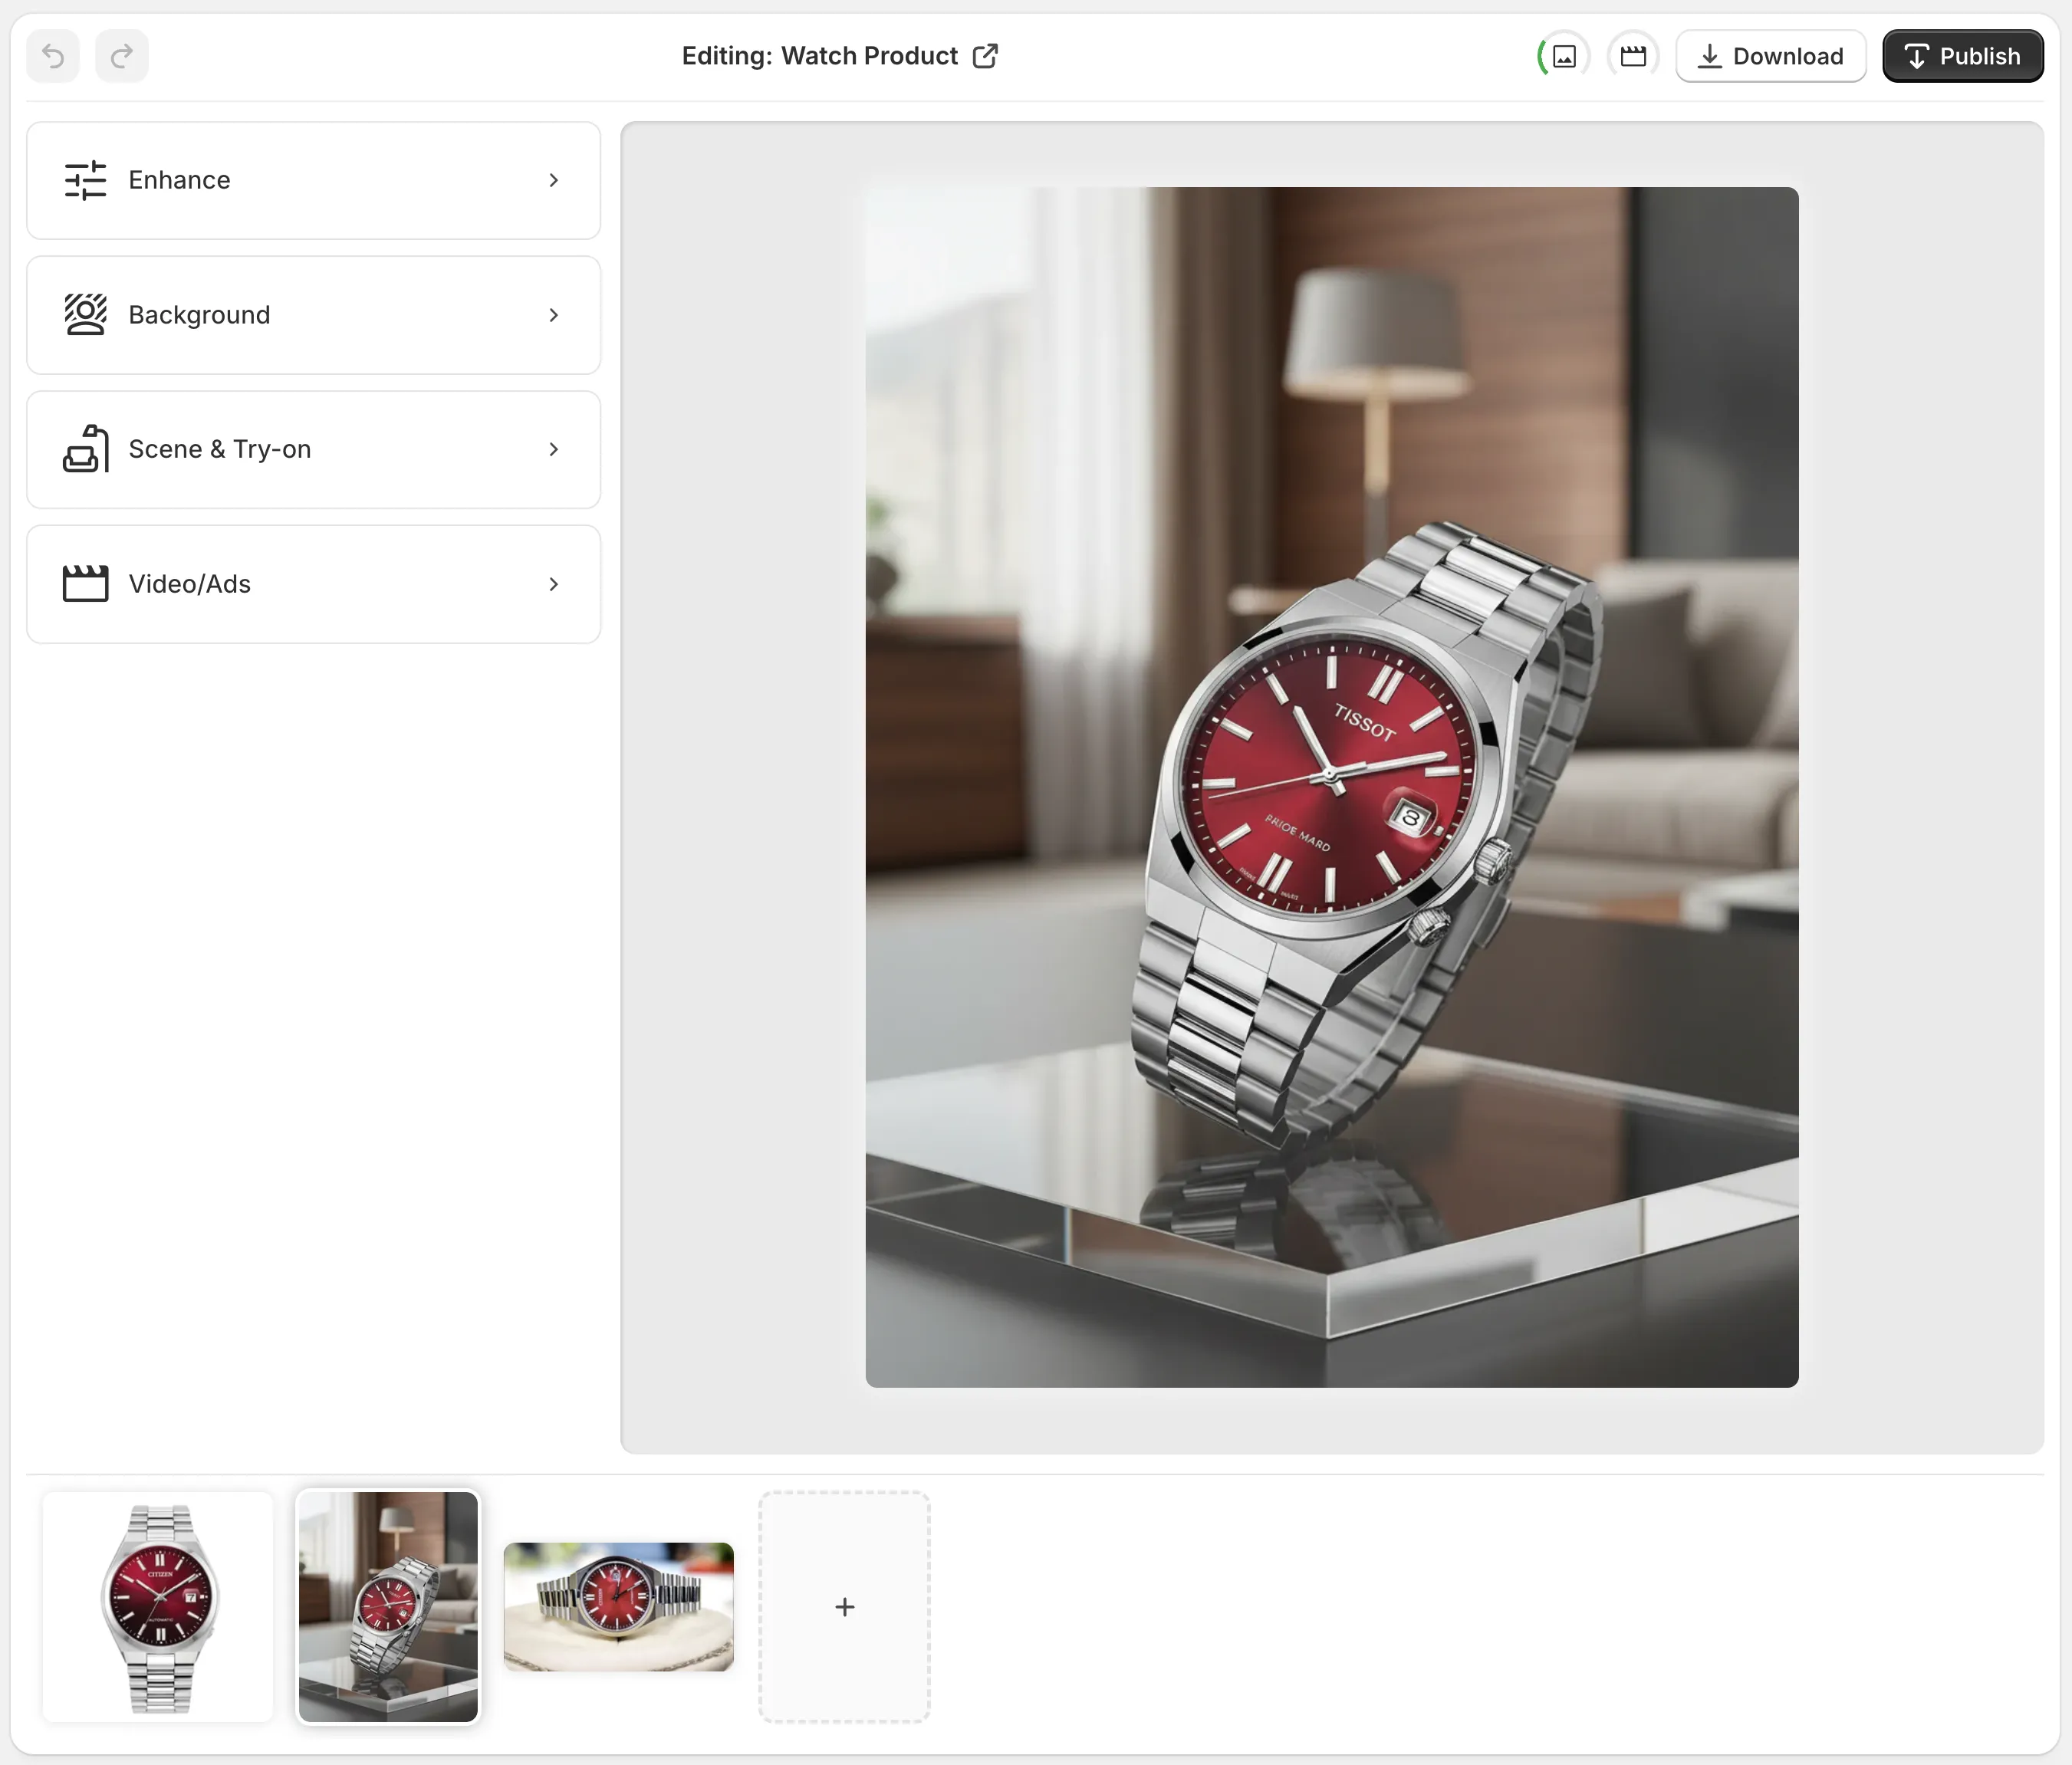
Step 3: Auto Enhance Product Photos in Supra AI Photo Studio
Once the app is installed, enhancing a product image is straightforward.
3.1 Load a Product Image from Your Catalog
- Open Supra AI Photo Studio in your Shopify admin.
- Select a product from your catalog or upload a standalone image.
- All images linked to that product will appear in the Image Gallery at the bottom.
- Click the image you want to enhance.
You’ll see the current photo in the Canvas on the right and the tools on the left.
3.2 Use Auto Enhance & Upscaling
In the tools panel:
- Select Auto Enhance.
- The AI will automatically:
- Denoise
- Deblur & sharpen
- Adjust colors and lighting
- Preview the transformation and confirm if you’re happy with it.
If the original photo is a bit small or pixelated, use Upscaling to:
- Increase resolution for zoomable product photos
- Make images sharper on high-DPI and mobile screens
You can undo/redo changes easily from the top bar, so it’s safe to experiment.
Step 4: Clean Up Backgrounds For a Professional Look
Even if your colors and sharpness are perfect, a messy background can make your store feel unprofessional.
4.1 Remove Distractions with Background Remover
From the tools on the left, choose Background Remover (or Isolate Product):
- The AI automatically cuts out your product
- Removes cluttered or inconsistent backgrounds
- Gives you a clean, transparent or solid-color background
This is especially useful if your old photos were taken on:
- Office desks
- Bedsheets
- Random rooms with visible objects in the background
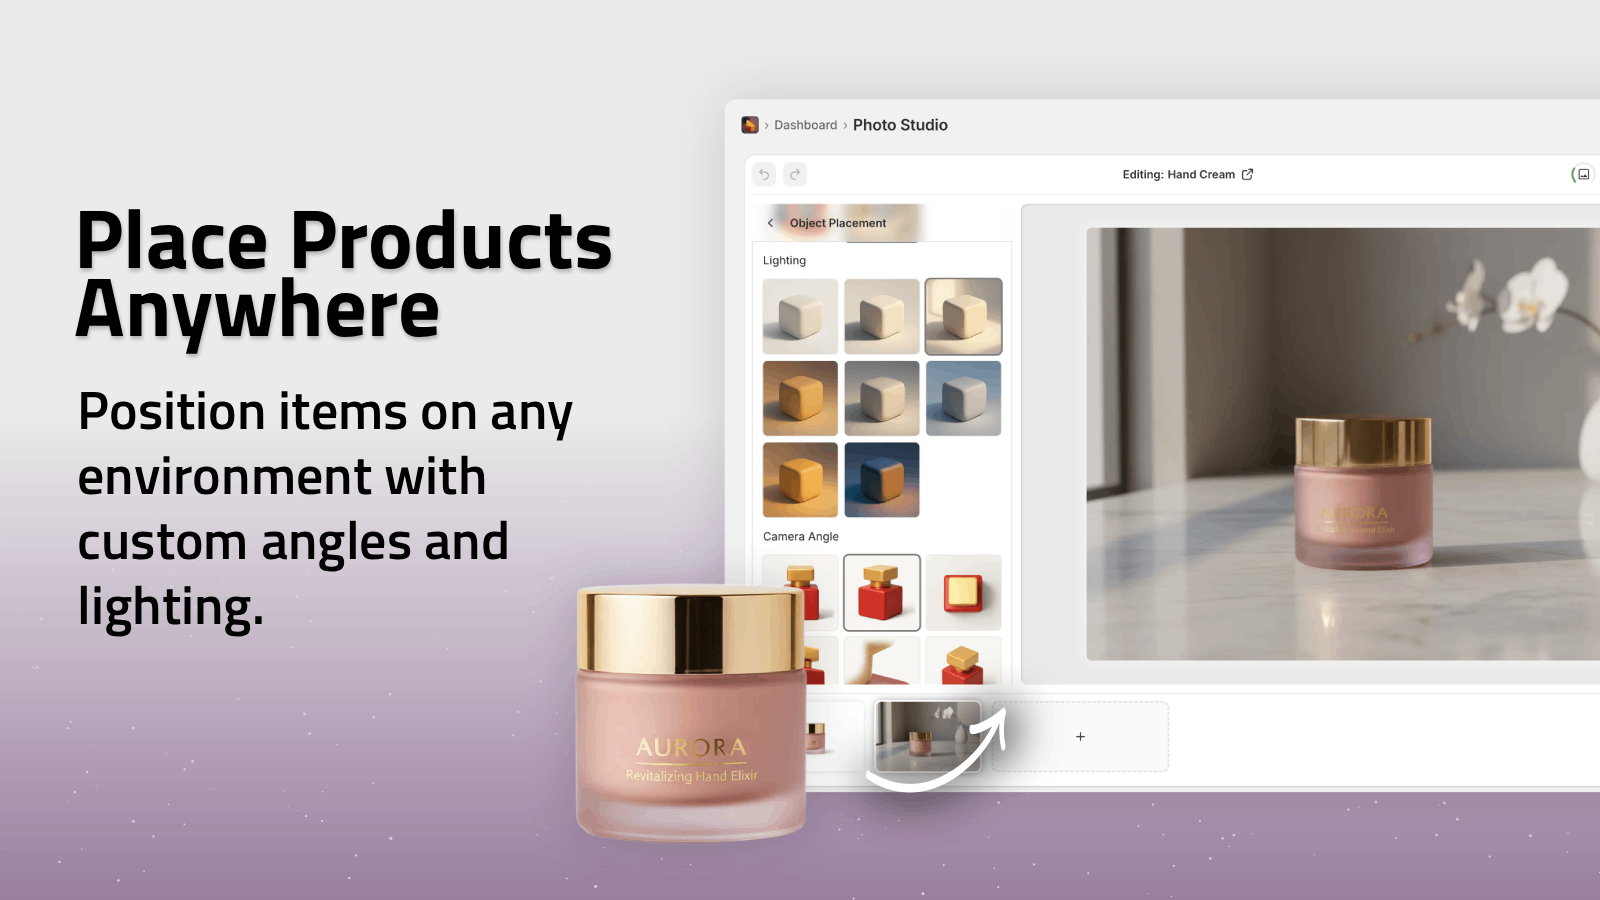
4.2 Replace Backgrounds with Brand-Consistent Scenes
Once your product is isolated, you can:
- Place it on a clean white or light gray background for a minimalist, marketplace-style look
- Use Object Placement to drop it into lifestyle scenes like:
- Kitchens, living rooms, offices
- Outdoor settings (parks, beaches, cityscapes)
- Studio-like surfaces (marble, wood, concrete)
Pro tip: Keep your main product image clean and clear (often with a simple background), and use lifestyle scenes for secondary images.
Step 5: Ensure Consistency Across Your Catalog
Auto enhancement isn’t just about making one photo look good. The real revenue boost comes from consistent product photography across your entire store.
Here’s how to use Supra AI Photo Studio to keep everything aligned:
- Use the same enhancement workflow for every product:
- Auto enhance → Upscale (if needed) → Isolate background → Replace/keep
- Stick to one primary background style (white, light gray, or on-brand color)
- For lifestyle shots, reuse similar scenes and lighting styles
This consistency:
- Makes your store look premium and trustworthy
- Reduces shopper hesitation
- Helps your brand become more recognizable
Bonus: Go Beyond Auto Enhance With AI Lifestyle & Try-On Images
Once your base images are enhanced, you can take your visuals a step further without a full photoshoot.
6.1 AI Try-On for Fashion & Accessories
If you sell apparel, jewelry, or accessories, Try-On in Supra AI Photo Studio lets you:
- Put your clothing or accessories on realistic AI models
- Change poses, body type, skin tone while keeping the product accurate
- Generate on-model photos in minutes
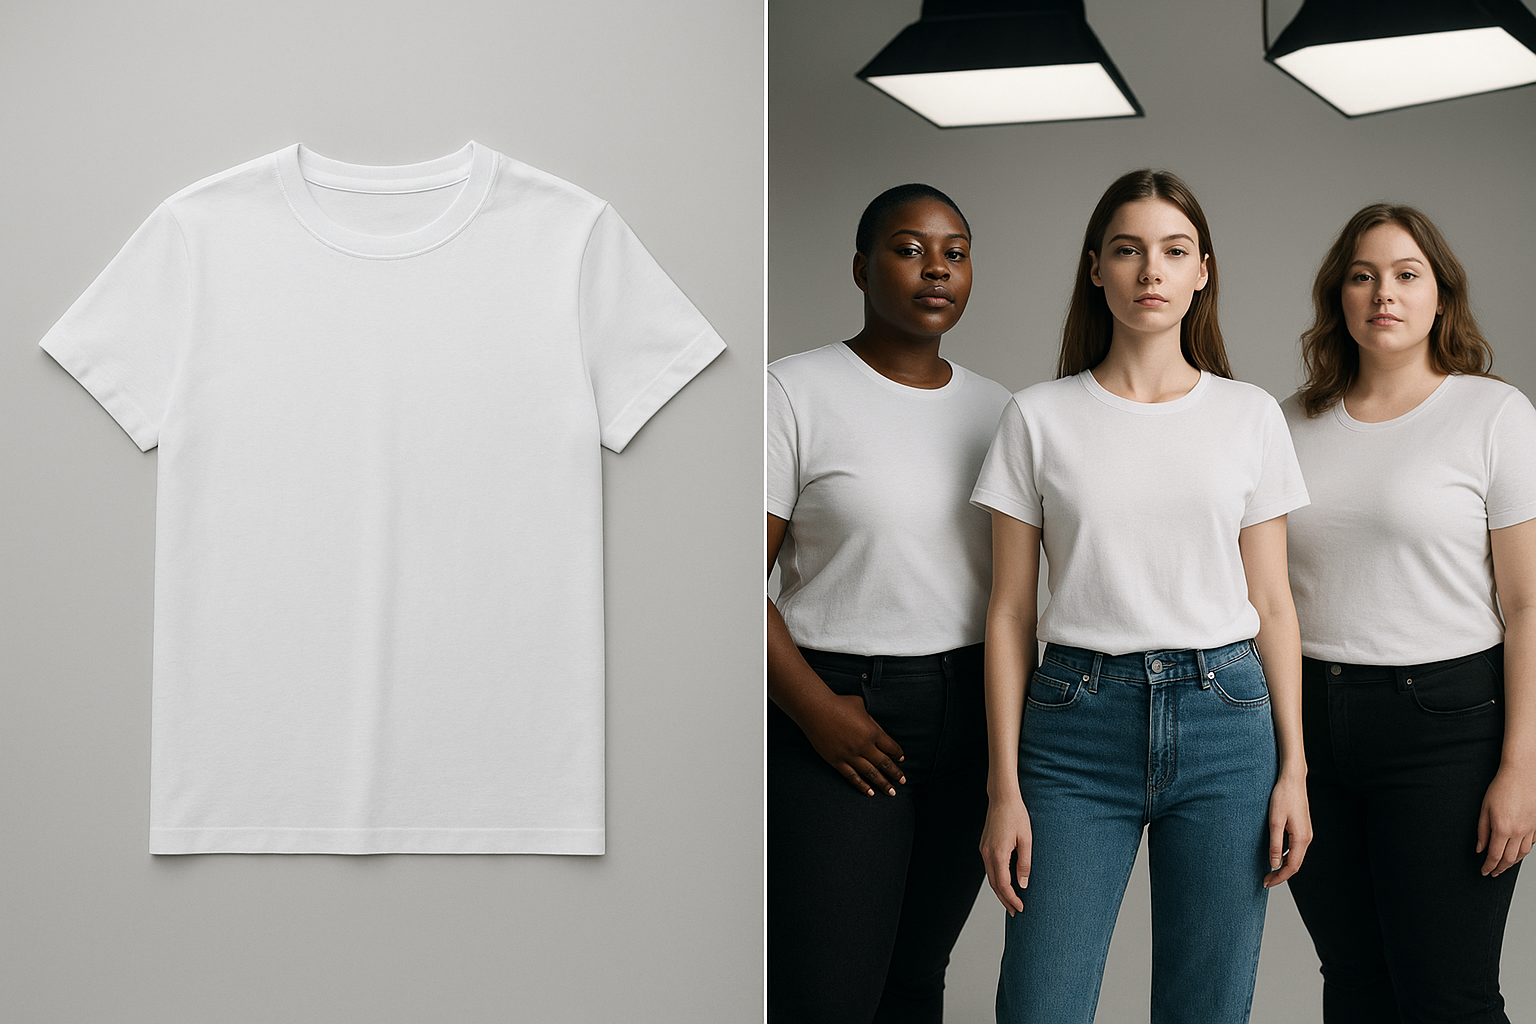
This is perfect if you:
- Don’t have budget for regular model shoots
- Want more size inclusivity in your visuals
- Need quick visuals for new colorways or drops
6.2 Object Placement for Lifestyle Product Photos
You can automatically place your enhanced products into:
- Luxury boutiques (for jewelry, fashion, decor)
- Kitchen counters (for cookware, food, appliances)
- Desks and workspaces (for tech and stationery)
This helps customers imagine how your product fits into their life, not just how it looks in isolation.
Step 6: Export & Publish to Your Shopify Store
When you’re satisfied with the enhancements:
- Use the Download button in Supra AI Photo Studio if you want local copies, or
- Click Publish to sync the new images directly to the product in your Shopify store.
The updated visuals will instantly appear on:
- Product pages
- Collections
- Any sections where that product image is used
You can always revert to older images or generate variations if you want to A/B test different looks.
Best Practices to Maximize Conversions With Enhanced Photos
To get the most out of auto-enhanced product photos:
- Show multiple angles – Front, side, back, close-ups
- Highlight key details – Textures, zippers, buttons, ports, ingredients
- Keep file sizes optimized – Use Shopify’s built-in compression or export web-friendly JPEG/WEBP to keep pages fast
- Use UGC-style content for ads – With Supra AI Photo Studio’s UGC and B-roll video generator, you can turn your enhanced images into:
- TikTok and Reels style clips
- Product unboxing or review-style videos
- Cinematic product drops with dust, liquid, or smoke effects

If you want to see what’s possible in motion, watch the Supra AI Photo Studio demo trailer.
How Much Does This Cost?
One of the biggest advantages of auto-enhancing with AI is cost efficiency.
Supra AI Photo Studio pricing overview:
- Free plan – 4 AI image generations/month
- Standard – 60 images/month
- Professional – 300 images + 5 videos/month
- Agency – 1000 images + 20 videos/month
Compare that to:
- Hiring a designer or retoucher for every batch of photos
- Booking studio time, models, and photographers
For most Shopify stores, the app pays for itself with one good product launch or a small bump in conversion rate.
You can review the full pricing and features on the official listing page.
Start Auto-Enhancing Your Shopify Product Photos Today
You don’t need expert gear or editing skills to have studio-quality product photography anymore. With AI-powered tools, you can:
- Auto enhance product photos in one click
- Fix lighting, sharpness, and colors instantly
- Remove messy backgrounds and create consistent visuals
- Generate lifestyle scenes, try-on images, and UGC videos
Install Supra AI Photo Studio, run a few of your current product photos through the auto-enhance and background tools, and compare the before/after.
Those visual upgrades can be the difference between a bounce and a sale.