How To Create Realistic Model Try‑On Photos (Without a Full Photoshoot)
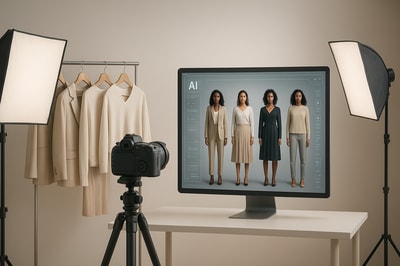
In this guide, you’ll learn exactly how to create realistic model try‑on photos that look professional, boost conversions, and stay on‑brand — without hiring a photographer.
We’ll walk through a practical workflow using Supra AI Photo Studio, an AI product photography app built for Shopify merchants.
Why Realistic Try‑On Photos Matter for Ecommerce
Before we dive into the how‑to, it’s important to understand why AI model try‑on photography is quickly becoming a must‑have for fashion and accessories brands.
- Higher conversion rates – Shoppers buy what they can imagine themselves wearing. On‑model images show fit, drape, scale, and styling, driving more “add to cart” clicks.
- Fewer returns – When customers can see how clothes, jewelry, or accessories look on a body, they’re less likely to be disappointed when the product arrives.
- Stronger branding – Consistent lighting, poses, and styling across your catalog make your store feel premium instead of random.
- Lower production costs – Virtual try‑on with tools like Supra AI Photo Studio can replace or drastically reduce the need for recurring studio photoshoots.
And the best part: you don’t need design skills. You just need clean product photos and a good AI workflow.
Step 1: Start With the Right Product Photo
AI can do a lot, but your input image still matters. For the most realistic AI try‑on results, follow these guidelines:
-
Use a clear, high‑resolution image
Aim for sharp photos with good lighting. Avoid heavy shadows or strong color casts. -
Show the full product
For apparel, the garment should be fully visible (front or back). For necklaces, earrings, hats, scarves, glasses, or bags, ensure they’re not cropped or cut off. -
Keep the background simple
A plain or lightly textured background works best. If your background is busy, you can fix it inside Supra using the Background Remover before running try‑on. -
Avoid extreme angles
Straight‑on or slightly angled shots make it easier for the AI to map the product onto models naturally.
If your images are low quality or noisy, you can enhance them first:
- Use Upscaling to improve resolution
- Use Auto Enhance to fix lighting, colors, and minor blur
You can do both right inside Supra AI Photo Studio.
Step 2: Install Supra AI Photo Studio on Your Shopify Store
To follow along, install Supra AI Photo Studio from the Shopify App Store:
Once installed:
- Open your Shopify admin
- Go to Apps → Supra AI Photo Studio
- Either pick a product from your catalog or upload a new image to start editing
You’ll land in the editor, which looks like this:
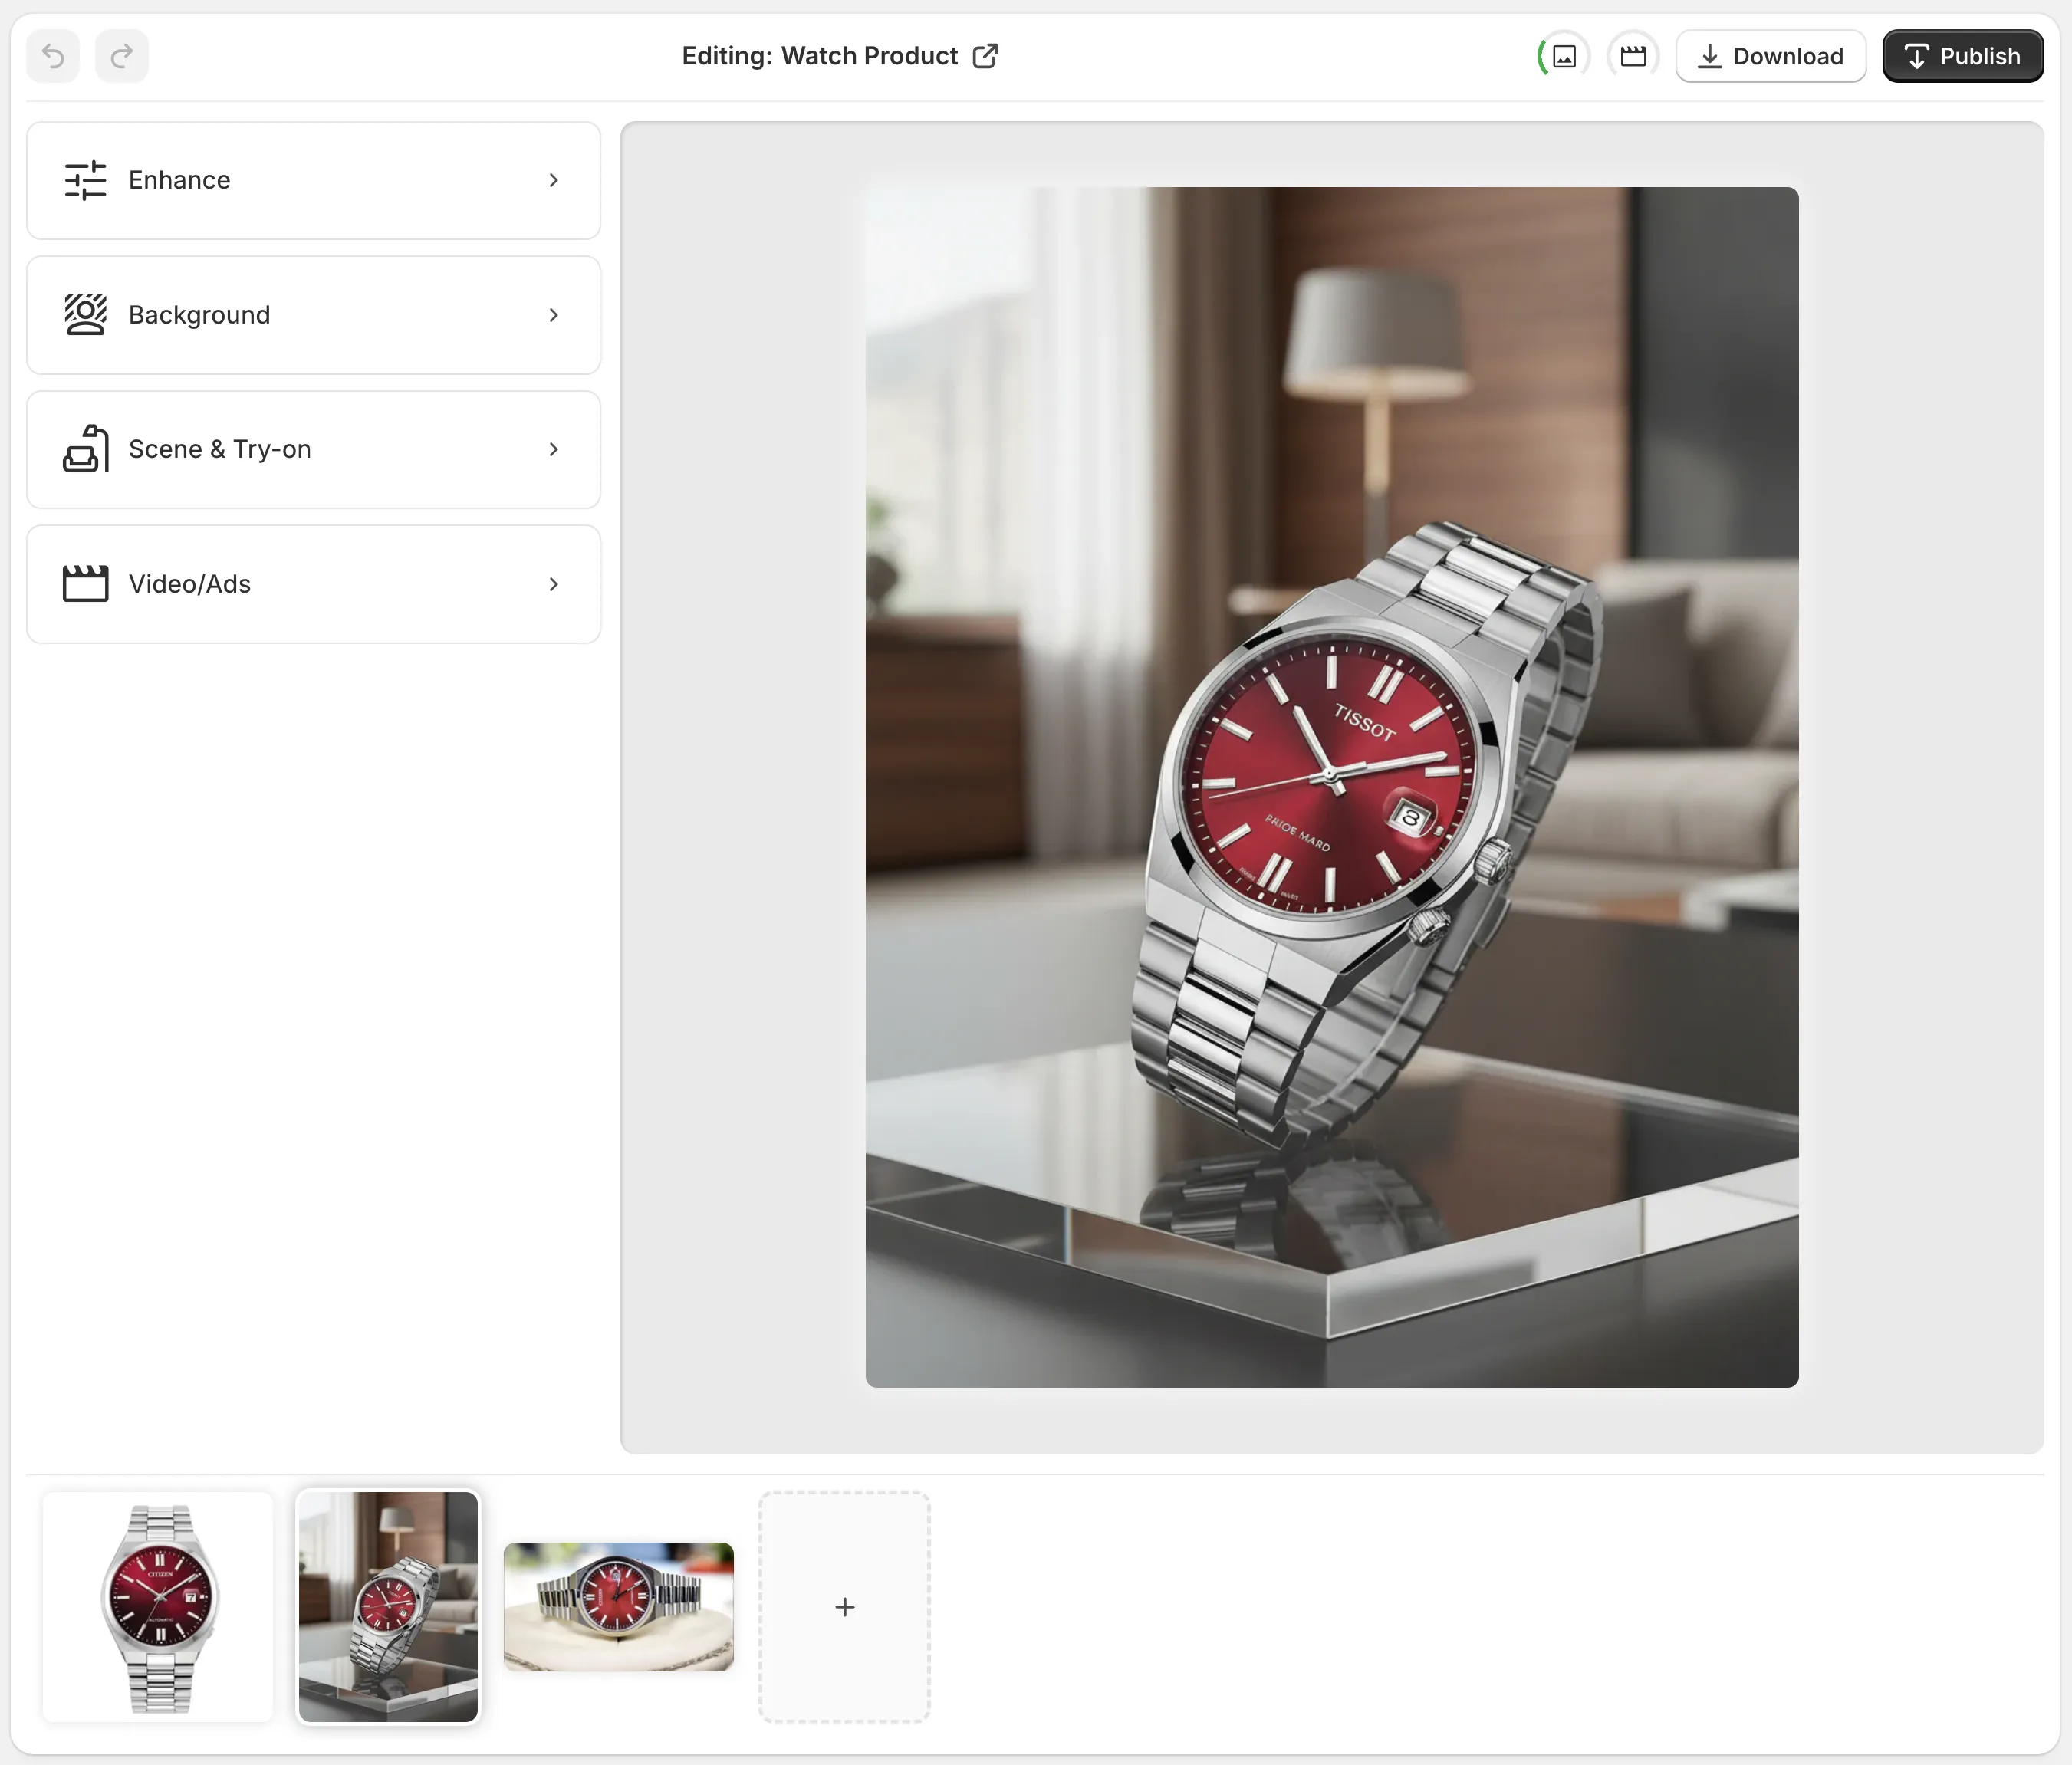
- Top bar – Undo/redo, switch products, download image, publish to product page
- Left tools panel – Background removal, Try‑On, Object Placement, Upscale, etc.
- Canvas – Where you preview and fine‑tune your generated images
- Image gallery – All images for that product (so you can create multiple try‑on variations)
Step 3: Isolate the Product for Best Try‑On Accuracy
For apparel and accessories, you’ll get the most realistic results if the product is isolated first.
- In the Tools panel, choose Isolate Product or Background Remover.
- Let the AI remove distractions and cut out your item from the background.
- If needed, you can re‑run or fine‑tune until the product edges look clean.
This helps the try‑on engine:
- Understand the exact shape and borders of the product
- Avoid mixing background colors with fabric or metal
- Preserve details like lace, straps, stitching, or chain links
Once your product is cleanly isolated, you’re ready for AI model try‑on.
Step 4: Use AI Try‑On to Put Your Product on Realistic Models
Now for the fun part: turning a flat product image into multiple realistic on‑model photos.
Inside the Supra editor:
- Select the AI Try‑On tool from the left panel.
- Choose or create your AI model:
- Skin tone, hair type and color
- Body type and height
- Gender expression and age range
- Choose pose and framing:
- Full body, mid‑shot, or close‑up
- Standing, sitting, walking, studio or lifestyle poses
- Optionally describe the look with a short prompt, for example:
- “Studio lighting, soft shadows, neutral background”
- “Casual streetwear vibe, soft daylight, simple urban backdrop”
Then, click Generate.
Supra’s AI will:
- Map your product accurately onto the model
- Maintain logo, pattern, length, and key details
- Respect fabric behavior (drape, stretch, folds) as much as possible
You’ll get multiple candidates to choose from and can re‑generate until you’re satisfied.
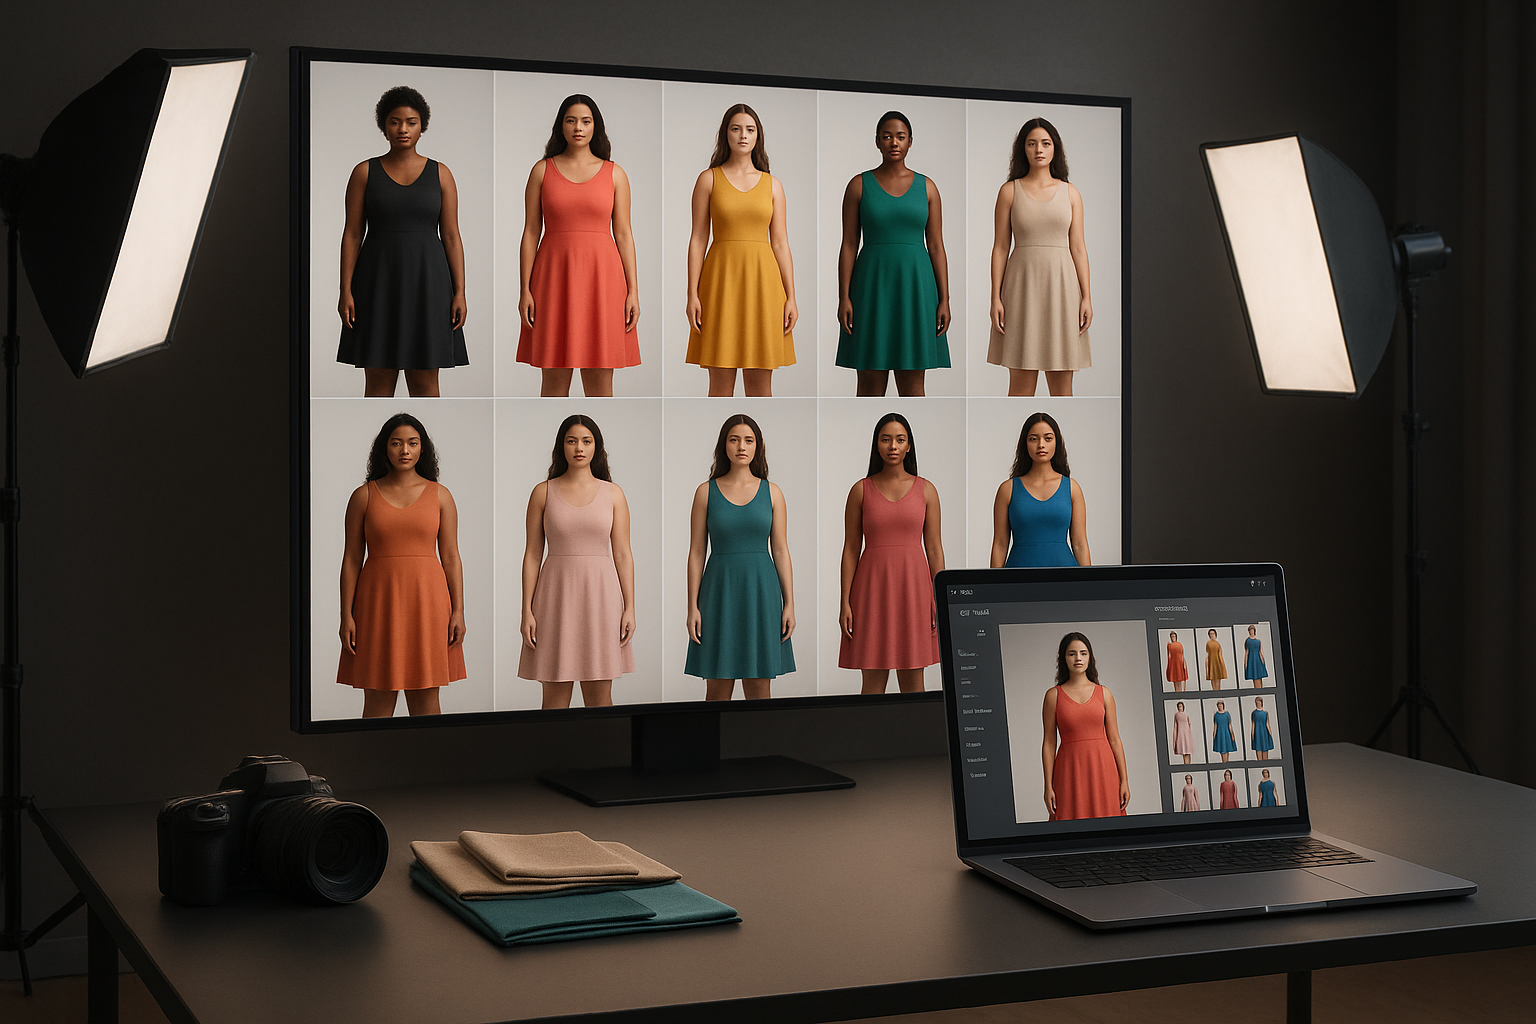
Step 5: Customize Models to Match Your Brand
Realistic try‑on photos aren’t just about accuracy — they’re about brand fit.
With Supra AI Photo Studio, you can:
- Reuse the same model across many products for a cohesive collection
- Create different body types to represent more customers
- Adjust skin tone and facial features to improve diversity
- Change hair styles to better match your target audience
Over time, this creates a virtual “model roster” that your shoppers will recognize across your catalog.
You can also use the Object Placement tool to go from simple studio shots to lifestyle scenes:
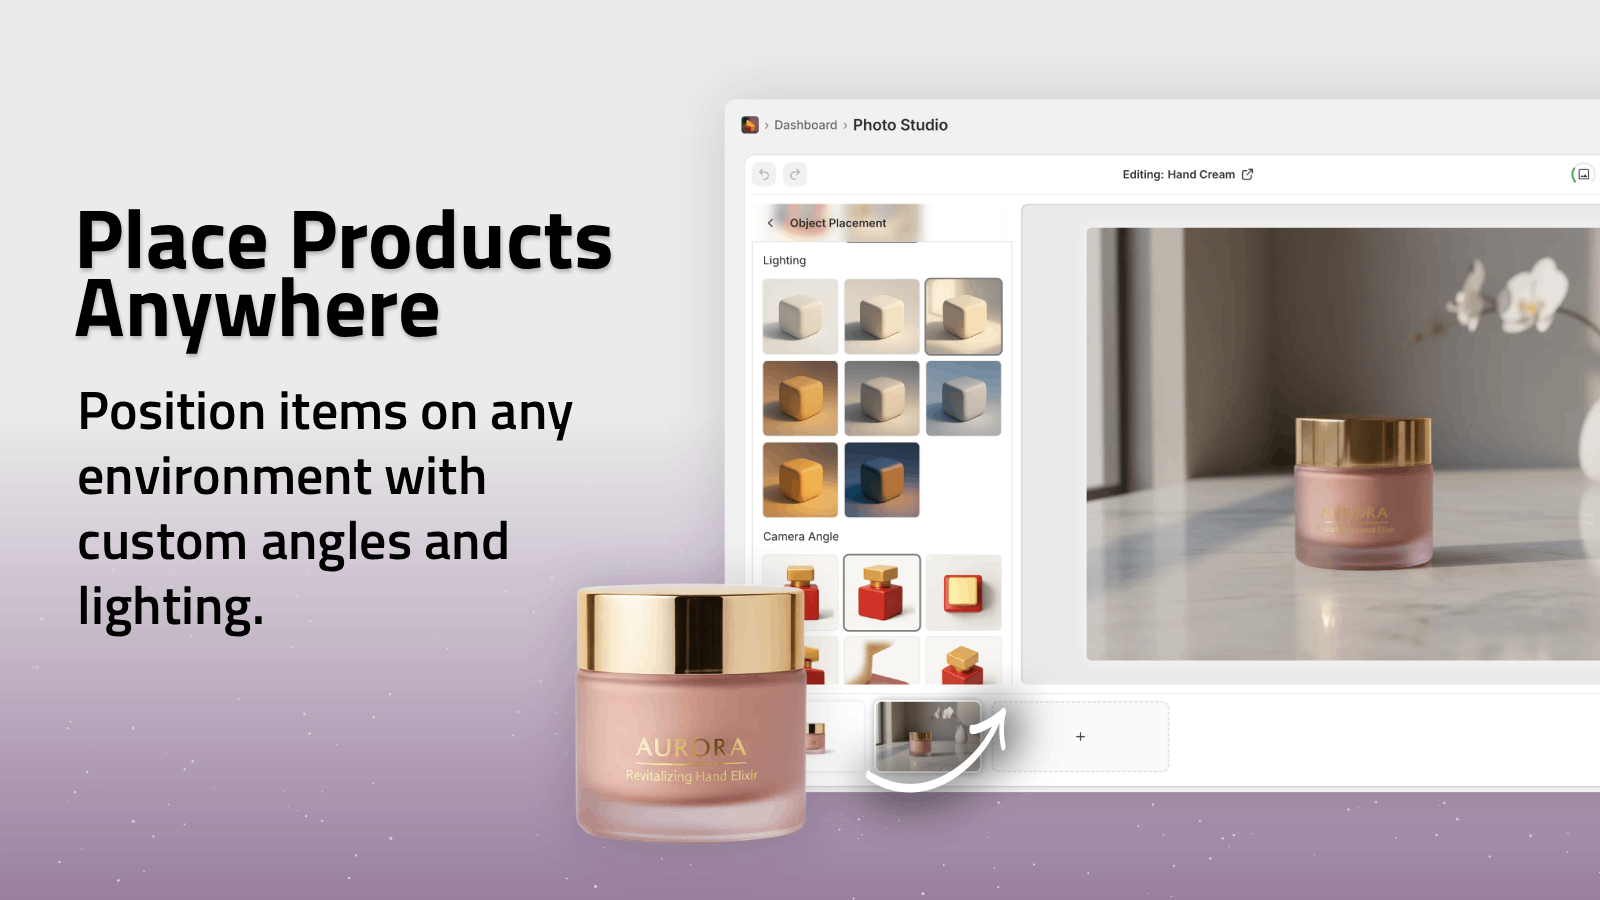
- Place clothing in a boutique setting
- Show jewelry on a vanity or dressing room table
- Feature bags in urban streets, cafés, or airport lounges
Step 6: Use AI Try‑On for More Than Just Clothing
Model try‑on is powerful for apparel, but it also works incredibly well for:
- Jewelry – Necklaces, earrings, bracelets, rings
- Eyewear – Sunglasses and optical frames
- Hats & headwear – Beanies, caps, headbands, turbans
- Scarves & shawls – Around the neck or shoulders
- Bags & backpacks – On shoulder, cross‑body, or in hand
You can show:
- Close‑ups for detail (for example, earrings and necklaces)
- Mid‑shots for tops, scarves, and bags
- Full‑body looks for dresses, outerwear, and full outfits
The key is to pick compositions that highlight both the product and how it’s worn in real life.
Step 7: Optimize Your Try‑On Photos for Shopify SEO & Conversions
Creating beautiful images is only half the job. To turn them into sales, you should:
1. Add multiple views per product
Upload several try‑on variations to each product page:
- Front view on model
- Side or angled view
- Close‑ups of fabric and details
- A mix of body types or skin tones if your audience is broad
You can manage all these inside Supra, then publish final selections back to your product with a click.
2. Keep your catalog consistent
Use Supra to:
- Standardize background styles (studio, soft gradient, minimal lifestyle)
- Keep lighting and color consistent
- Align camera angles (especially for lookbooks and collections)
Consistent visuals make your brand feel trustworthy and premium.
3. Use descriptive alt text
For each image, add SEO‑friendly alt text like:
- “Model wearing black linen midi dress with V‑neck in studio lighting”
- “Close‑up of gold hoop earrings on model with curly hair, neutral background”
This helps search engines understand the content and improves accessibility.
4. Repurpose try‑on photos into video
Supra can also generate UGC‑style videos and B‑roll clips from your product visuals:
- Influencer‑like talking head videos explaining the product
- Short vertical clips for TikTok, Reels, and Shorts
- Cinematic b‑roll like fabric swishes, product rotations, or detail shots
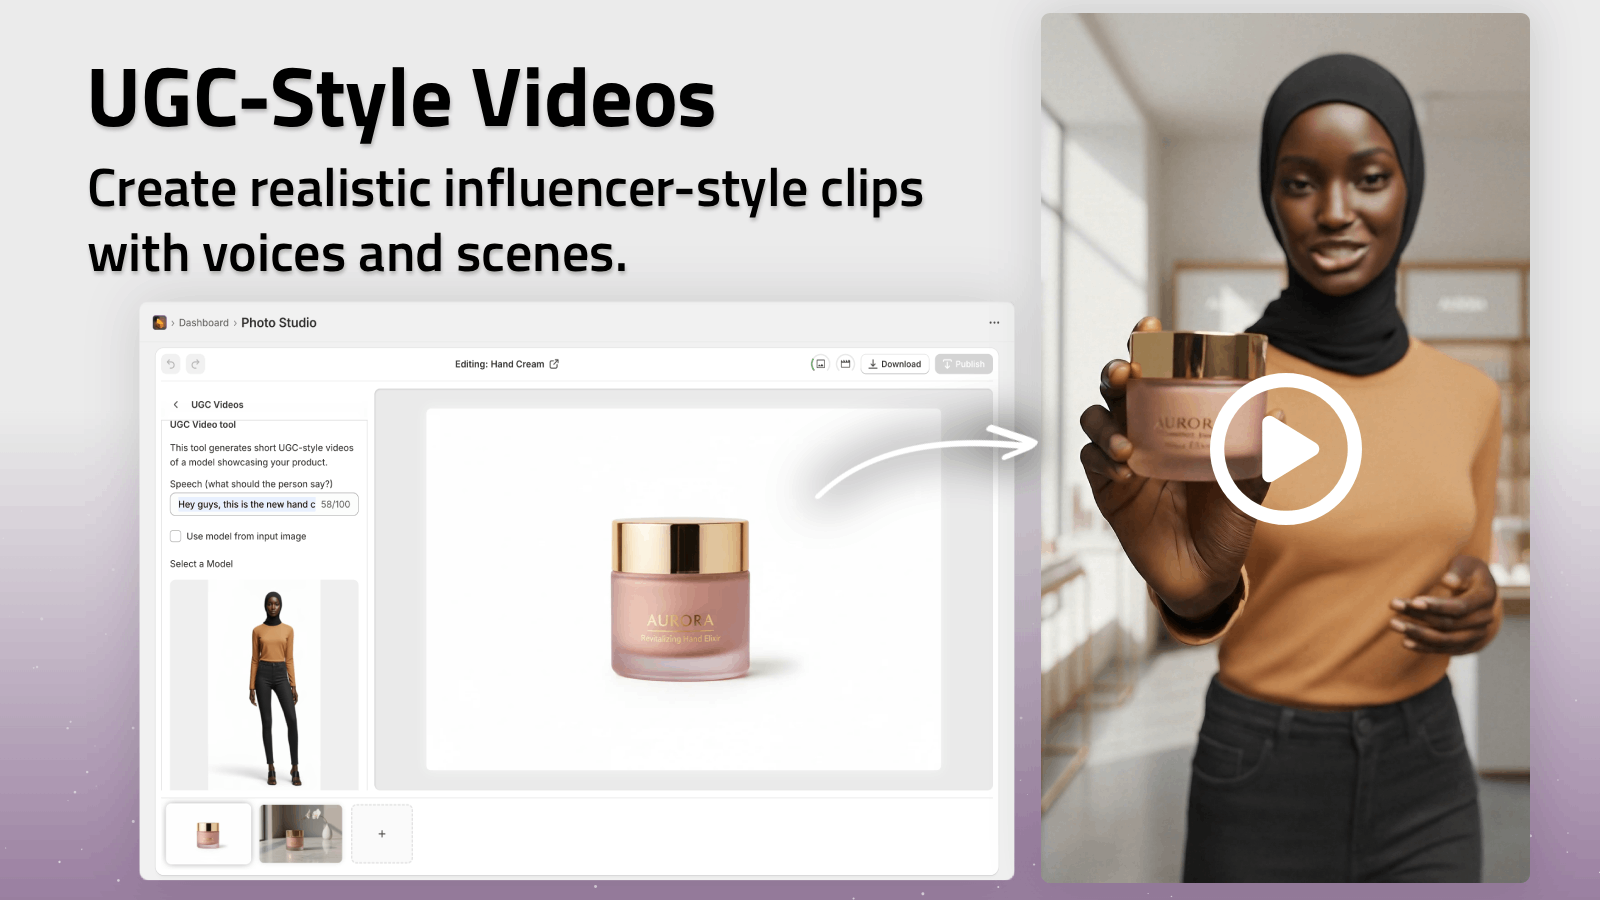
You can see a quick demo of what’s possible here:
Tips for Ultra‑Realistic AI Try‑On Results
To get results that look like an actual photoshoot instead of AI, keep these best practices in mind:
-
Avoid over‑stylized prompts
Stick to realistic lighting and environments: “soft studio light”, “natural window light”, “simple indoor setting”. -
Be specific about the product
In your instructions, mention key details: “keep the floral pattern sharp”, “short sleeves above the elbow”, “logo centered on chest”. -
Match lighting to your brand
Decide on a look (bright and airy, warm and cozy, cool and modern) and repeat it across all try‑on images. -
Check product accuracy
Don’t sacrifice truth for aesthetics. Make sure the AI hasn’t changed lengths, colors, or prints. Regenerate if needed. -
Test on mobile
Most Shopify traffic is mobile. Preview your product pages on phone screens to ensure your try‑on images are clear and impactful.
From Flat Photos to Full Lookbooks in Hours
With a good workflow, you can turn a simple product shot into a full campaign:
- AI‑enhanced studio images
- Multiple realistic model try‑on angles
- Lifestyle scenes using Object Placement
- Short UGC‑style explainer videos
- Cinematic b‑roll for ads
All created inside Shopify, using one app:
👉 Supra AI Photo Studio on the Shopify App Store
If you’re ready to:
- Stop relying on plain flat lays and mannequin shots
- Launch collections faster without constant photo shoots
- Give customers the realistic, on‑body visuals they expect
…then adding AI try‑on to your product photography is the fastest upgrade you can make.
Install Supra, start with a handful of hero products, and in a single afternoon you can transform how your entire catalog looks — and sells.