Best Lighting Tips For Product Photography On Shopify
Lighting can make or break your product photography on Shopify. The same product can look cheap or premium, flat or dimensional, depending on how you light it. In a world where customers can’t touch or feel your products, lighting is your most powerful sales tool.
In this guide, you’ll learn the best lighting tips for Shopify product photography, plus how to fix common lighting problems instantly with Supra AI Photo Studio.
Why Lighting Matters So Much For Shopify Stores
Good lighting doesn’t just make photos "pretty"—it directly impacts your revenue:
- Higher conversion rates – Clear, bright, well-lit images increase trust and reduce hesitation.
- Fewer returns – Accurate color and detail means customers know what they’re buying.
- Stronger brand identity – Consistent lighting across your catalog makes your store look professional and premium.
If your images look dark, dull, or inconsistent, customers subconsciously assume the same about your brand.
Natural vs Artificial Light: Which Is Best For Shopify?
Natural Light
Natural light (sunlight) is soft, flattering, and free, which makes it ideal when you're just starting.
Best for:
- Lifestyle shots
- Clothing, accessories, home decor
- Products where a natural vibe fits your brand
Pros:
- Soft shadows, pleasant tones
- Great for lifestyle scenes near a window
- No special equipment needed
Cons:
- Unpredictable: changes by hour and weather
- Harder to maintain consistent looks across your whole catalog
Artificial Light (Continuous Lights / LEDs)
Artificial lighting gives full control and consistency, which is crucial for scaling your Shopify store.
Best for:
- Catalog images on white or light backgrounds
- Jewelry, cosmetics, electronics, and small products
- Stores that need repeatable, consistent results
Pros:
- Same look every day, any time
- You control brightness and direction
- Easier to match lighting across hundreds of products
Cons:
- Requires some gear
- Slight learning curve
Pro Tip: Use natural light for lifestyle, and artificial light for product page images. You can then unify the look using an AI editor like Supra AI Photo Studio.
The 3 Fundamentals of Product Lighting
1. Direction of Light
Where the light comes from determines the mood and clarity of your image.
- Front lighting (light coming from behind the camera) → Very even, but can look flat.
- Side lighting (from left or right) → Adds depth and texture, ideal for most products.
- Back lighting (light behind the product) → Dramatic, great for bottles, cosmetics, translucent items.
For Shopify product photos, side or 45° angled lighting is typically the sweet spot: it keeps details clear while adding subtle depth.
2. Quality of Light (Soft vs Hard)
- Soft light = big light source, close to product, with diffusers. Creates soft shadows and smooth gradients.
- Hard light = small, direct source (bare bulb, direct sun). Creates strong, sharp shadows.
Online shoppers usually prefer soft light—it looks clean and premium.
You can soften light by:
- Putting a diffuser between the light and your product (white curtain, diffuser panel, softbox)
- Bouncing light off a white wall or foam board
3. Color of Light (Color Temperature)
Light has a "color" measured in kelvin (K):
- ~2700–3200K – warm (yellowish)
- ~5000–5600K – neutral daylight (ideal for product photos)
-
6500K – cool (blueish)
Always try to:
- Use one color temperature at a time
- Turn off mixed lights (e.g. don’t combine warm room lamps and cool window light)
- Aim for daylight-balanced lights (5000–5600K) for accurate product colors
If your images still look off, you can correct color and lighting automatically with Auto Enhance in Supra AI Photo Studio.
Simple Lighting Setups You Can Use Today
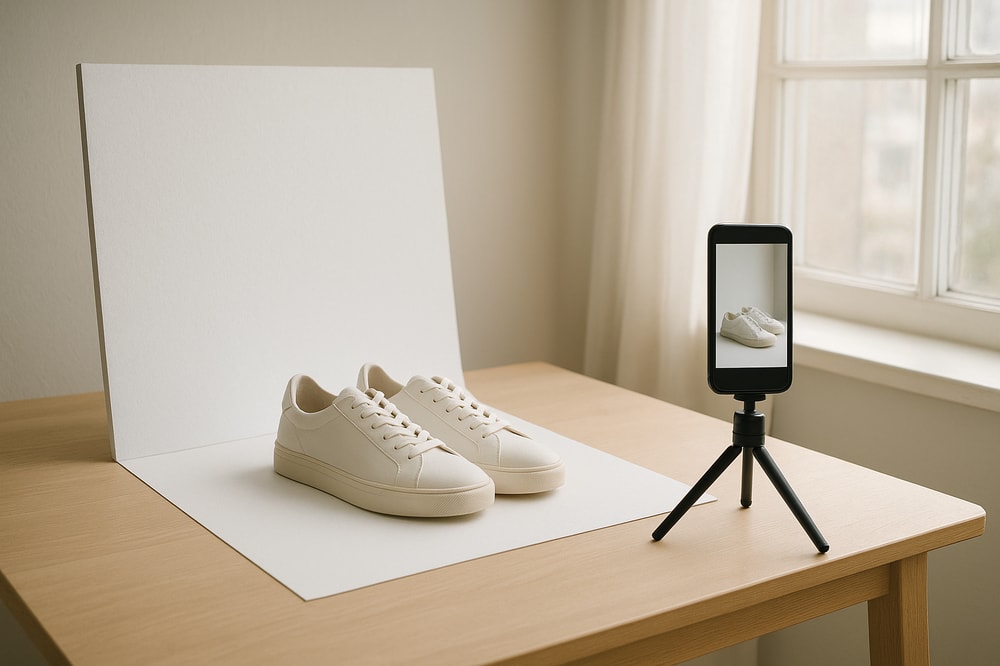
1. Zero-Budget Window Light Setup
Perfect if you’re just getting started.
You need:
- A bright window (ideally north-facing for even light)
- A table or surface
- A white background (sheet, foam board, paper)
- A second white board or cardboard as reflector
How to set it up:
- Place your table next to the window.
- Put your product on the table, with the window to the left or right side.
- Place a white board on the opposite side to bounce light back and soften shadows.
- Turn off any other room lights to avoid color casts.
Use this for: clothing details, small decor, accessories, stationery.
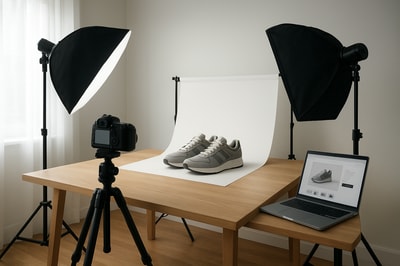
2. Basic Two-Light Ecommerce Setup
Once you can invest in a bit of gear, this is ideal for clean catalog photos.
You need:
- 2 continuous LED lights or softboxes (daylight balanced)
- 1 white or light grey background
- Tripod (optional but recommended)
How to set it up:
- Put your product about 1–2 feet in front of the background.
- Place the main light at a 45° angle to the product, slightly above eye level.
- Place the fill light on the other side, lower power, just to soften shadows.
- Adjust power until the product is evenly lit with soft, minimal shadows.
Use this for: consistent catalog images that look professional and scalable.
If your background isn’t perfectly white, you can use the Background Remover in Supra AI Photo Studio to create clean, studio-style product photos:
Controlling Shadows For Clean Shopify Photos
Shadows are not the enemy—but messy or harsh shadows can make your store look unprofessional.
To soften or reduce shadows:
- Move your light closer (larger relative size = softer light)
- Use a bigger diffuser or softbox
- Add a reflector (white foam board) opposite the main light
To add depth and avoid flat images:
- Slightly angle your light to create gentle, directional shadows
- Avoid lighting the product perfectly straight-on from the camera’s position
If you like the shot but the shadows ended up too strong, you can:
- Use the Auto Enhance tool in Supra AI Photo Studio to balance contrast and brightness.
- Replace the entire background with a subtle lifestyle scene using Object Placement.
Getting Accurate Colors With Good Lighting
Nothing frustrates customers more than receiving a product that looks like a different color from the photos.
For accurate color:
- Use daylight-balanced lights (5000–5600K)
- Avoid mixing window light with warm indoor bulbs
- Use neutral backgrounds (white, grey, beige)
- Slightly underexpose rather than overexpose to preserve color detail
Then, use Auto Enhance in Supra AI Photo Studio to fine-tune:
- White balance (color temperature)
- Exposure and contrast
- Saturation and clarity
This is especially crucial for fashion, cosmetics, and branded products.
How To Fix Bad Lighting Without Reshooting Everything
Sometimes you don’t have the option to reshoot. Maybe the stock is gone, or you already shipped the items. This is where AI tools can save you.
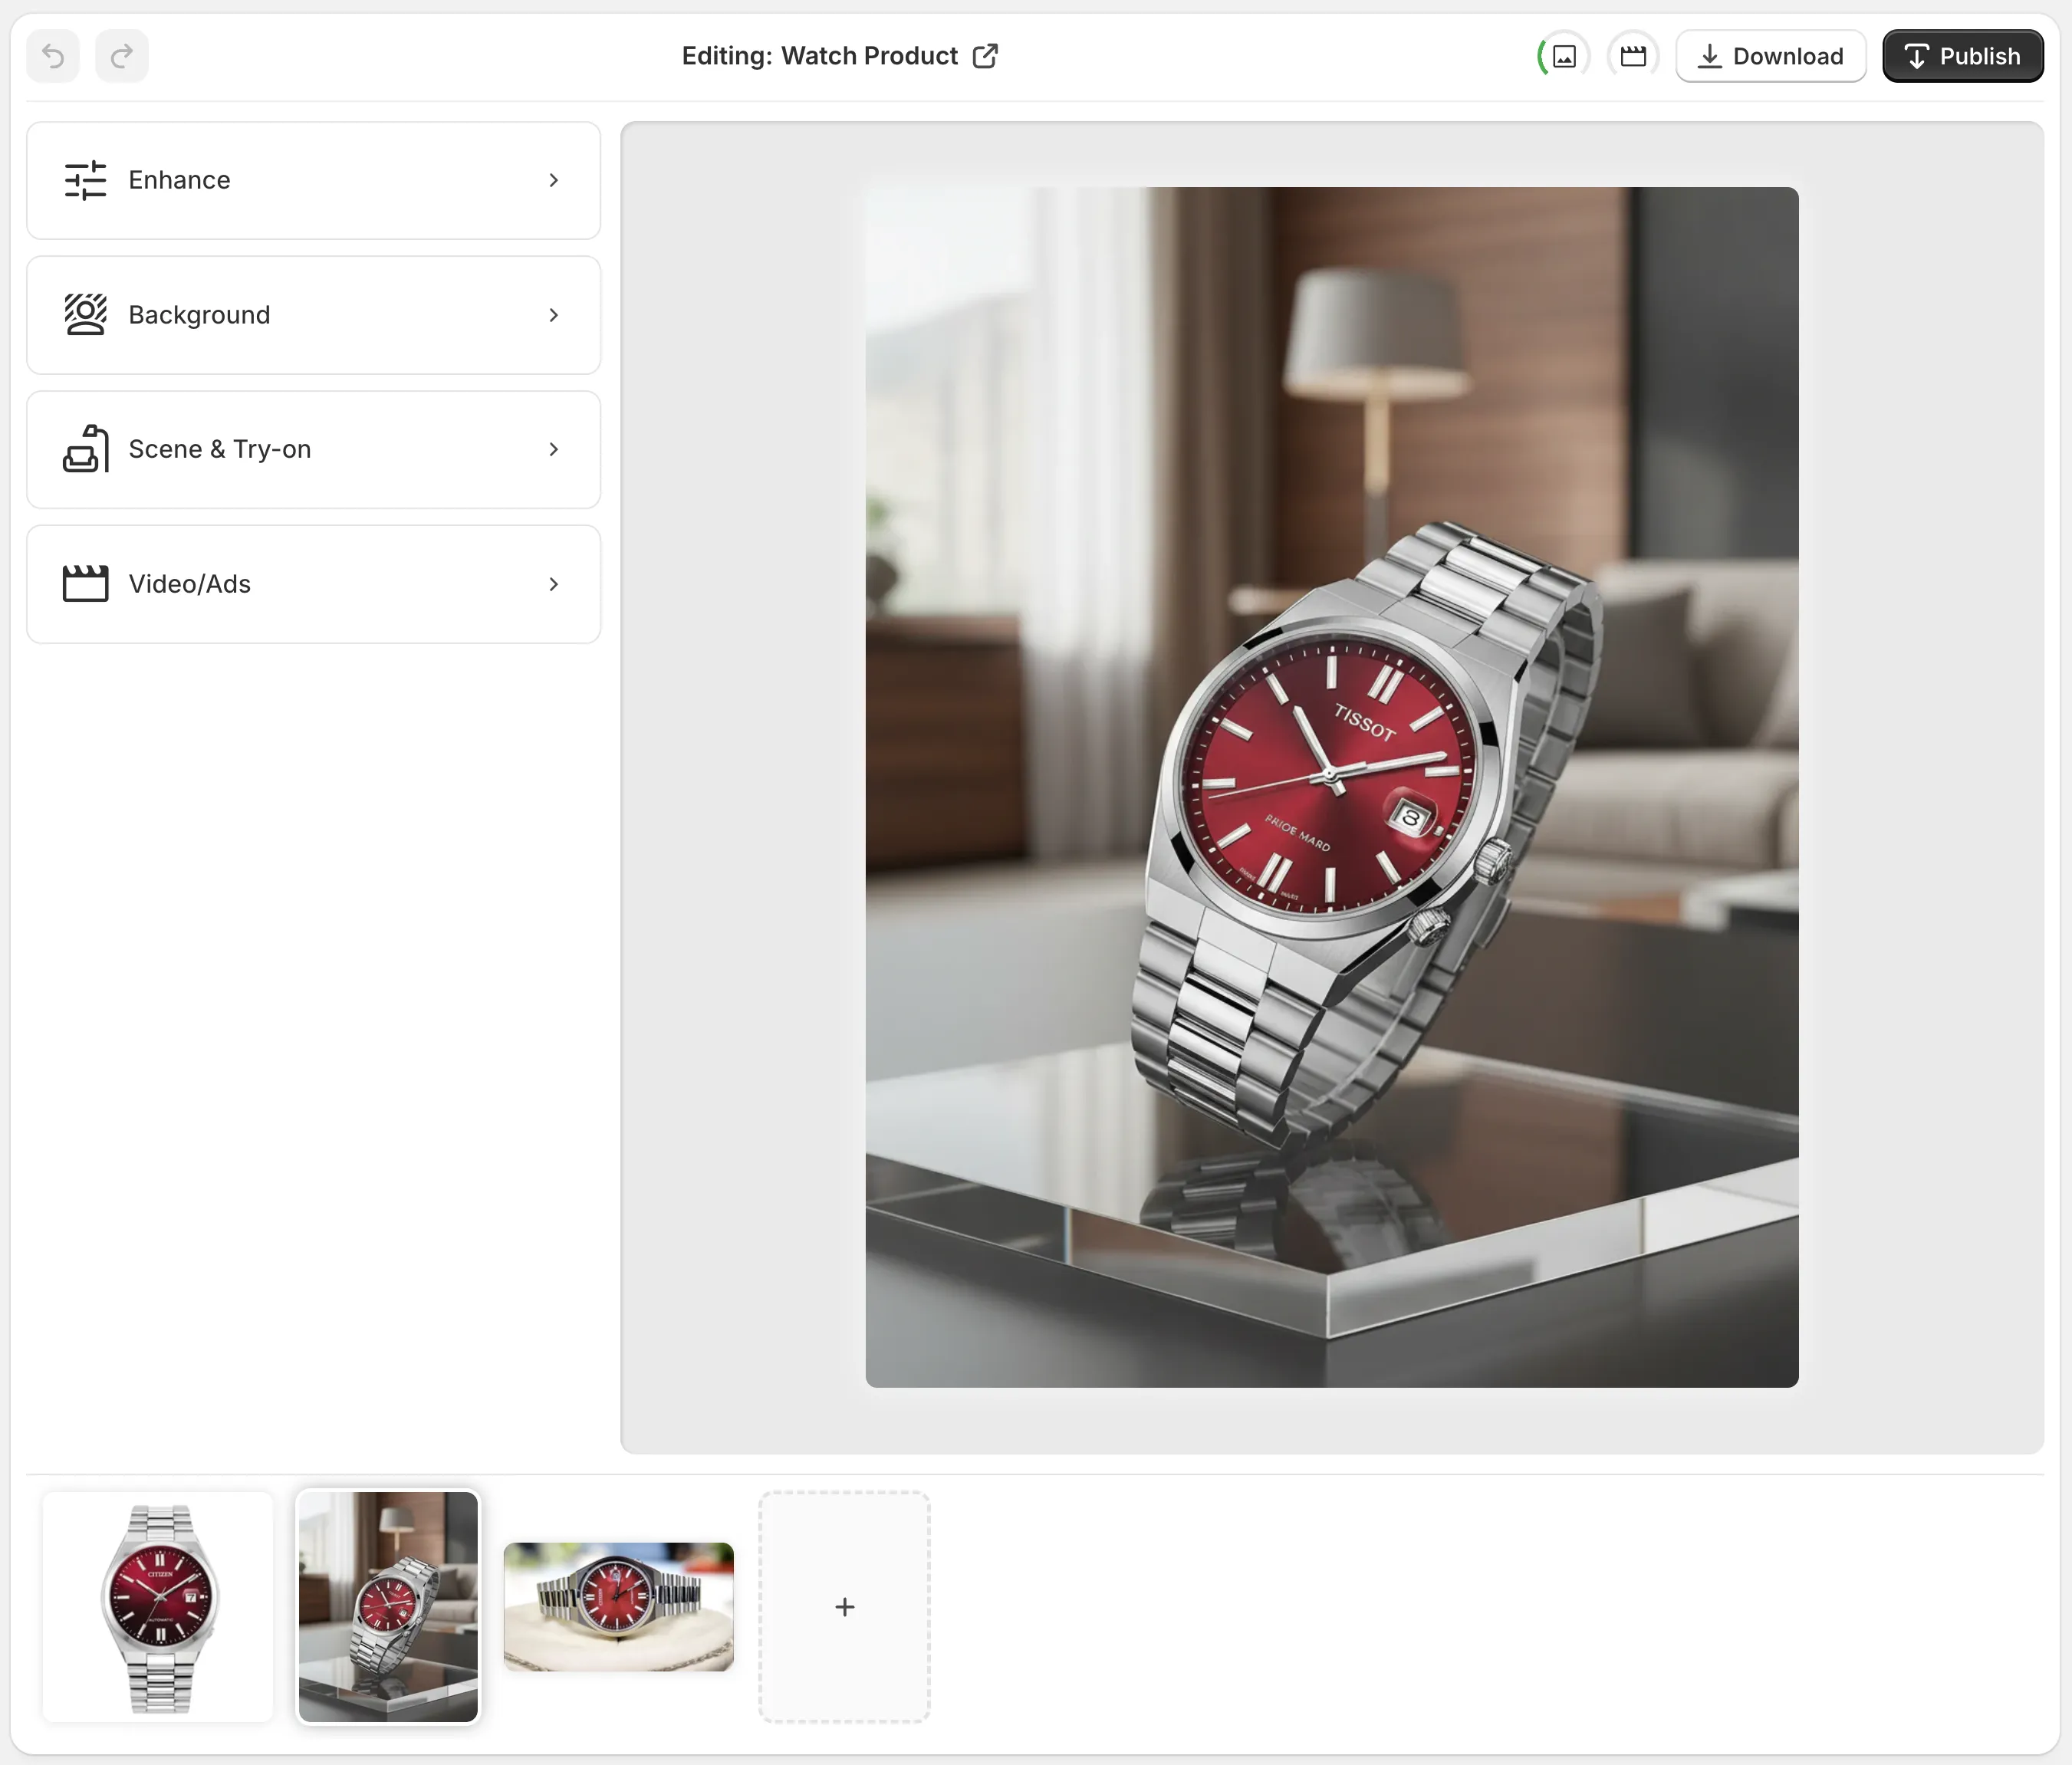
Supra AI Photo Studio runs directly inside your Shopify admin and lets you repair or upgrade your lighting in minutes:
1. Auto Enhance Photos
Fix dark, flat, or noisy images automatically:
- Denoise and deblur
- Adjust exposure and contrast
- Correct color temperature and tint
2. Replace Bad Backgrounds
Use Background Remover to cut out your product and drop it into:
- Clean white backgrounds for catalog shots
- On-brand colored backgrounds
- Lifestyle scenes that match your target audience
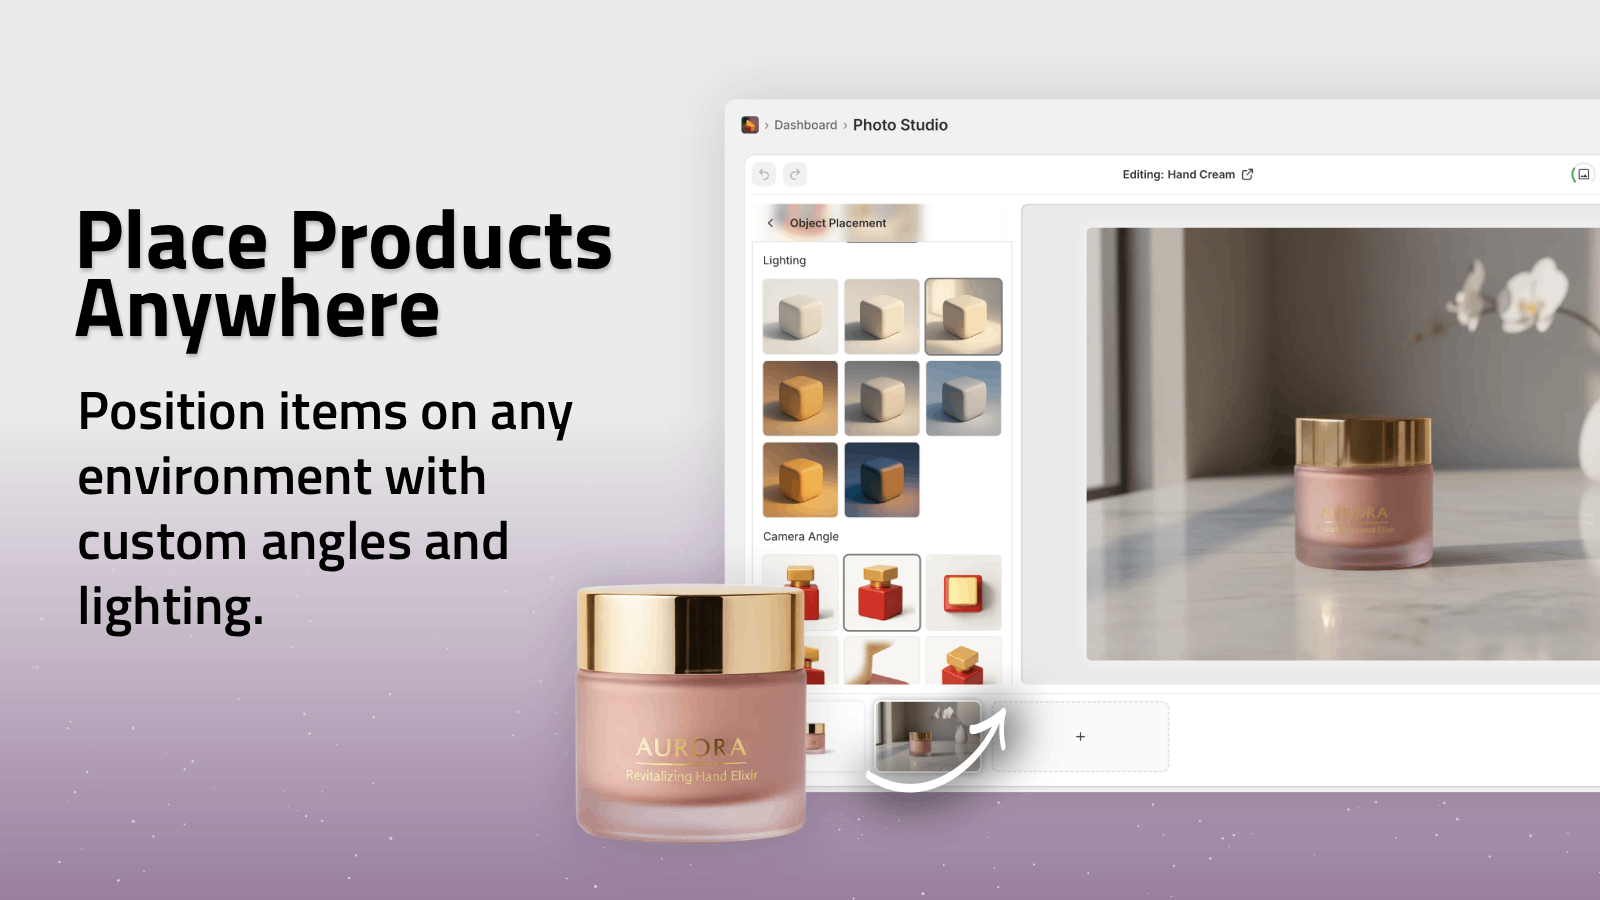
3. Create Lifestyle Lighting Without a Studio
With Object Placement, you can simulate perfect lighting conditions by placing your product in AI-generated environments:
- Kitchens, offices, bathrooms, outdoors, studios, luxury boutiques and more
- Control camera angle and mood without ever touching a physical light
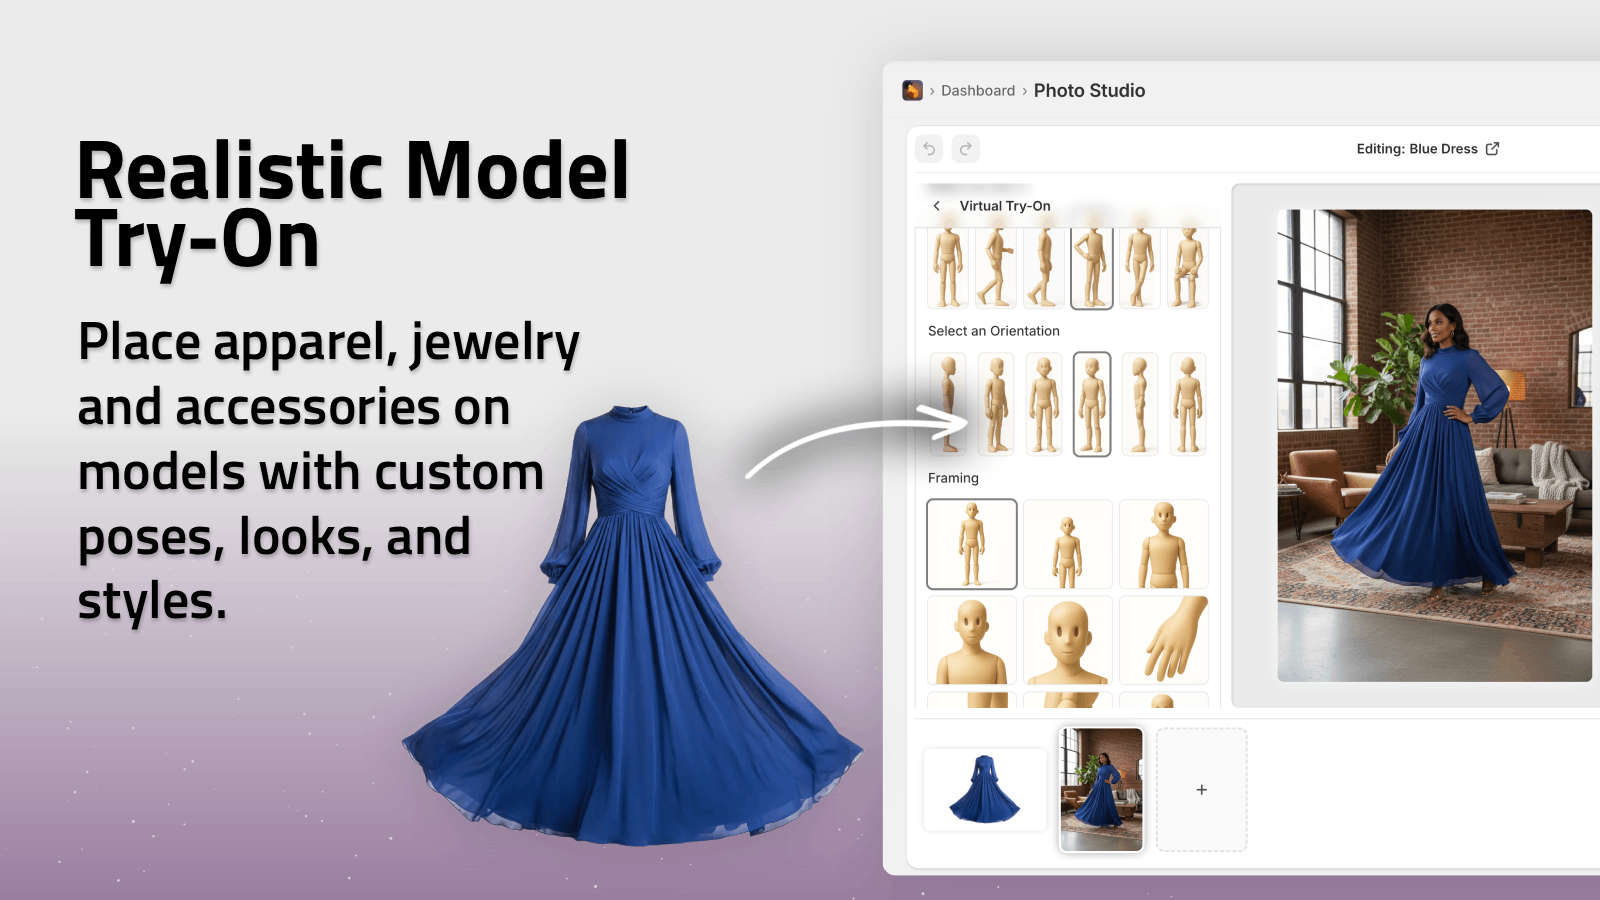
4. Enhance Fashion Shots With AI Try-On
If your on-model lighting isn’t perfect or you don’t have models at all, use AI Try-On:
- Put your apparel on realistic AI models
- Adjust skin tone, body type, and pose
- Keep product colors and details accurate while enjoying beautifully lit results
You own all the images and videos generated, so you can safely use them on product pages, ads, and social media.
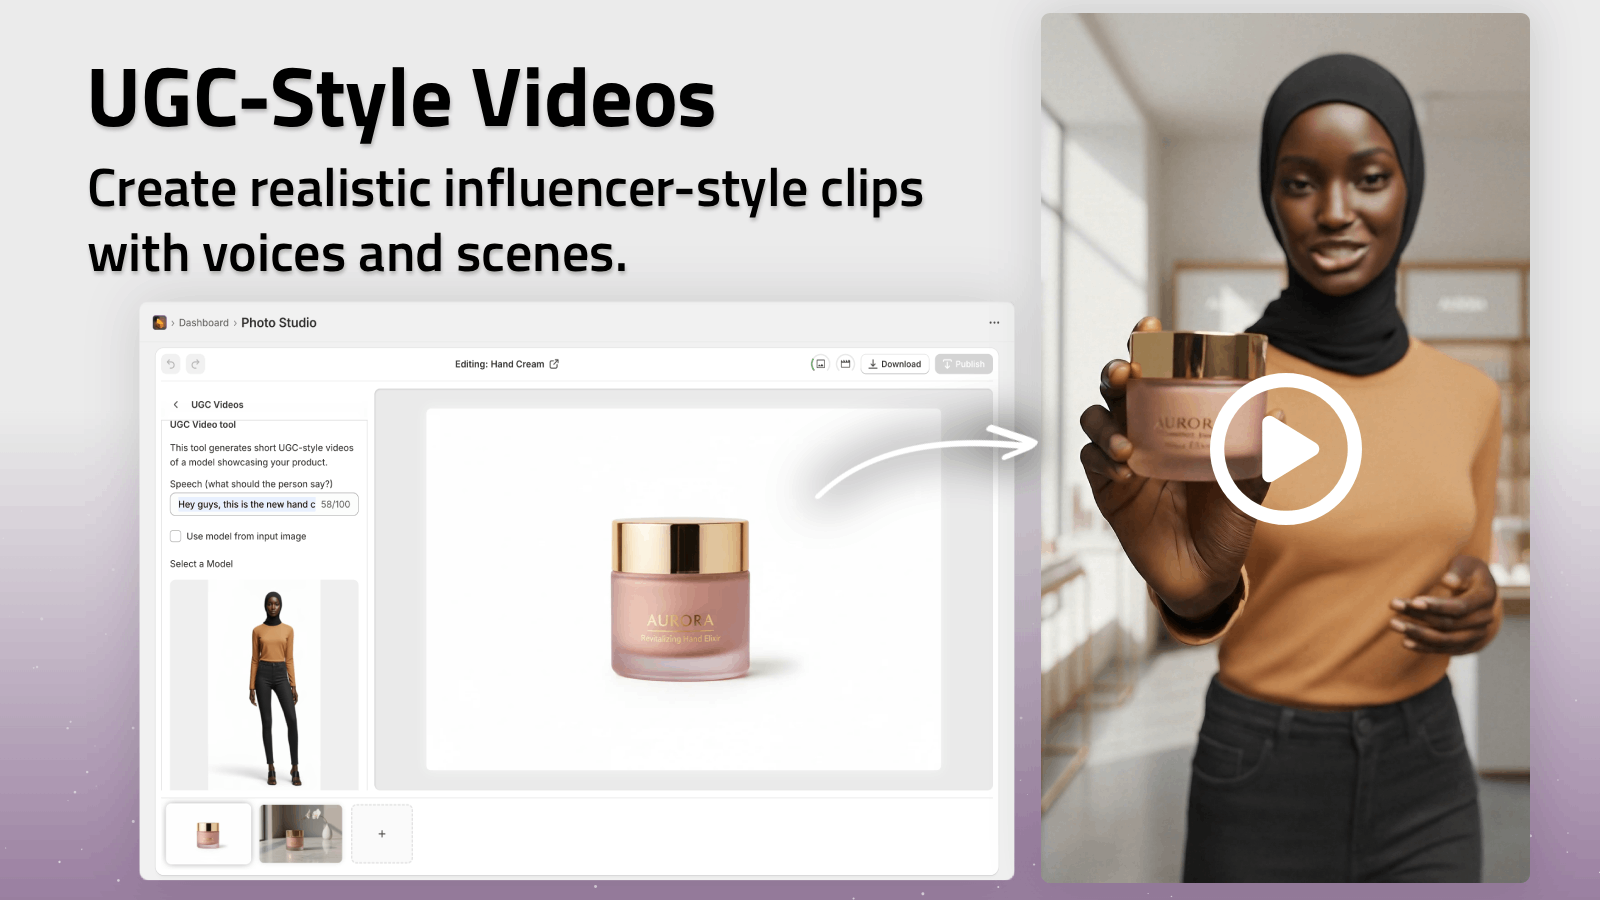
Bonus: Lighting For Product Videos & UGC
If you’re running TikTok, Reels, or paid ads, lighting matters just as much for video.
Instead of building complex video lighting setups, you can use Supra AI Photo Studio’s UGC and B-roll video generation features:
- Turn a product image into influencer-style UGC video with natural-looking lighting
- Generate cinematic B-roll with dramatic highlights and shadows tailored to your product
See it in action in the demo trailer:
https://www.youtube.com/watch?v=M2ISy20la78
Practical Lighting Checklist For Your Next Shoot
Before you upload anything to Shopify, run through this quick checklist:
- Is the light soft (not harsh or overly contrasty)?
- Are there no mixed light sources with different color temperatures?
- Are the shadows controlled (soft and not distracting)?
- Does the product’s color match reality?
- Is the background clean and on-brand?
- Do images across your catalog look consistent?
If any answer is "no", open Supra AI Photo Studio in your Shopify admin and:
- Use Auto Enhance for quick lighting fixes
- Remove or replace problematic backgrounds
- Generate lifestyle scenes or try-on images without reshooting
Turn Your Lighting From Good To Irresistible
Perfect lighting used to require a full studio, expensive gear, and a professional photographer. Now, with a simple window setup and AI-powered editing, you can create high-conversion product photos from home.
Use these lighting tips to get your base images as good as possible—then let Supra AI Photo Studio handle the rest:
- Clean, consistent lighting across your entire catalog
- Studio-quality backgrounds and lifestyle scenes
- Professional model try-ons and UGC-style videos
Install Supra AI Photo Studio on your Shopify store today and turn your existing product photos into a visually cohesive, high-converting brand: