How To Add Multiple Product Angles To Shopify Listings (And Make Them Convert)
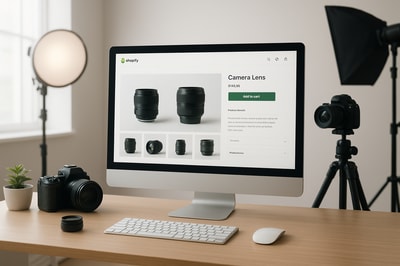
Adding multiple product angles to your Shopify listings is one of the fastest ways to increase trust and boost conversions.
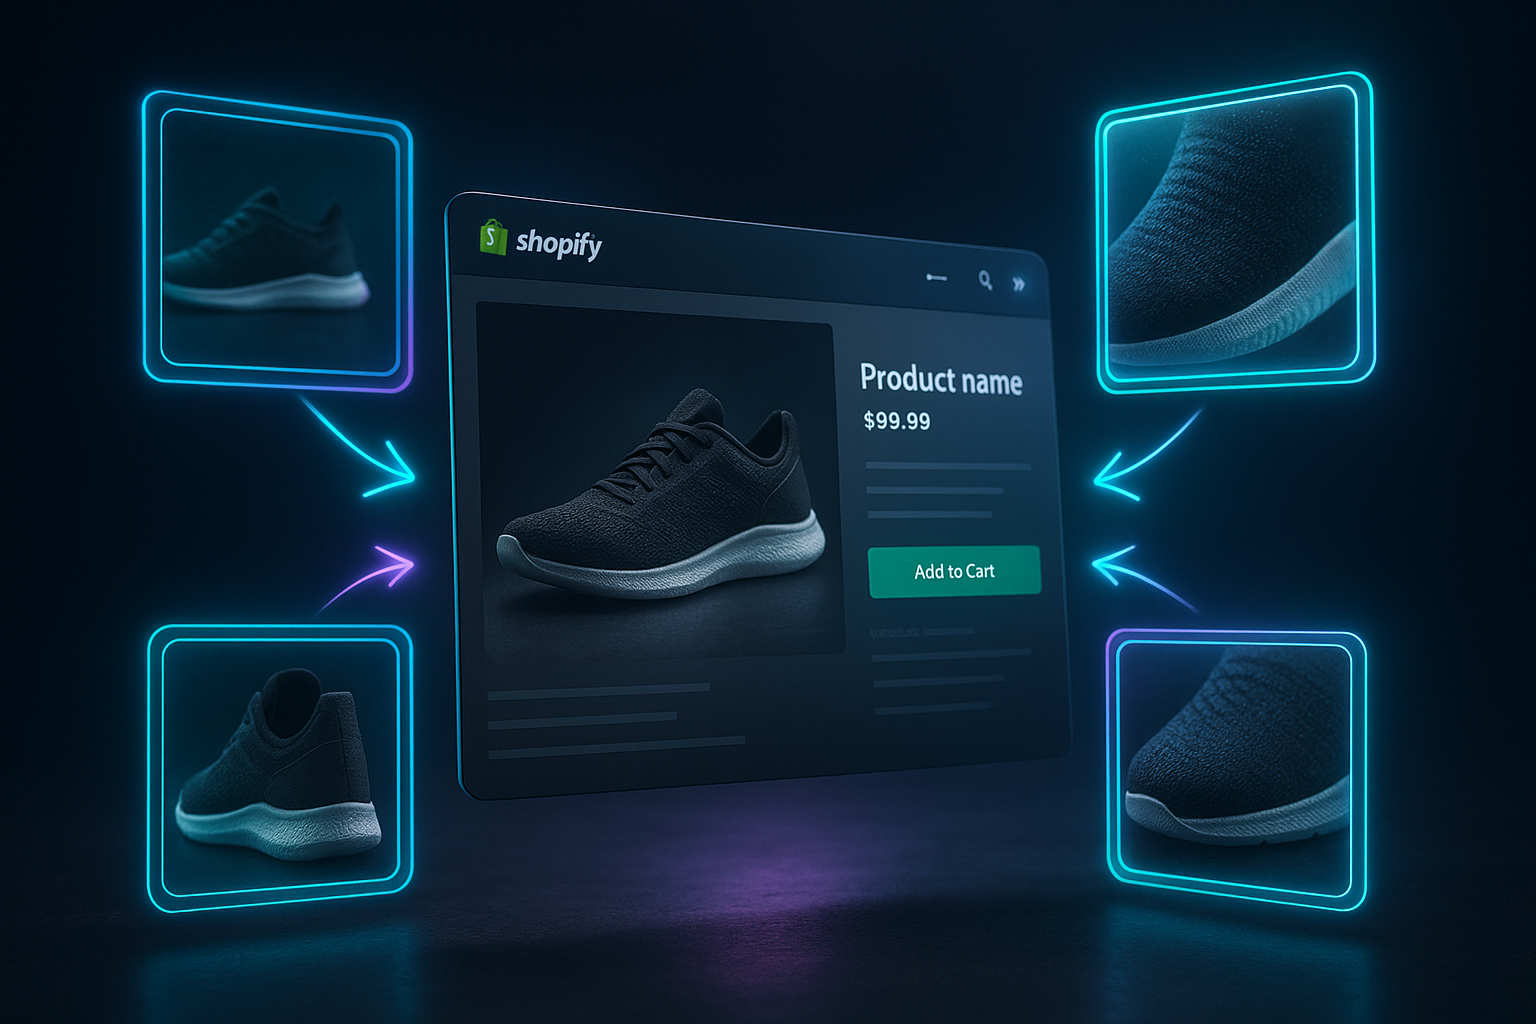
When shoppers can see the front, back, side, close‑ups, and lifestyle views, they’re far more likely to feel confident enough to click “Add to cart.” In this guide, you’ll learn exactly how to add multiple images to a product on Shopify, how to organize them for maximum impact, and how to create missing angles even if you only have one basic photo.
Why Multiple Product Angles Matter for Shopify SEO & Conversions
Multiple product angles don’t just look nicer — they directly impact:
- Conversion rate – More visual detail lowers perceived risk.
- Return rates – Customers know what they’re getting.
- Time on page & engagement – Shoppers zoom, swipe, and interact.
- SEO – Well‑optimized image alt text helps your product pages rank.
If you’re still using a single flat product photo, you’re leaving money on the table.
Step 1: Understand How Shopify Handles Multiple Images
Shopify lets you upload multiple media items per product:
- Standard images (JPG, PNG, WEBP)
- 3D models (GLB/GLTF)
- Videos (MP4, MOV, etc.)
These media items appear in your product gallery. The first image is usually treated as the featured image (what shows on collection pages and search results), while the rest appear as thumbnails or additional slides.
Important: Each product variant can also have its own image, but the overall product gallery is where you show different angles and contexts of the same item.
Step 2: How To Add Multiple Product Angles in Shopify
Follow these steps to upload multiple angles for an existing product.
A. From the Shopify Admin
- Log in to your Shopify admin.
- Go to Products → All products.
- Click the product you want to edit.
- In the Media section, click Add media.
- Select multiple files from your computer for:
- Front view
- Back view
- Side views (left/right)
- Top/bottom (if relevant)
- Detail close‑ups (texture, buttons, stitching, ports, etc.)
- Lifestyle/context shots
- Click Open to upload.
- Reorder the images by dragging and dropping them in the Media section.
Tip: Put your cleanest front view first, followed by your most persuasive lifestyle shot as the second image. Many shoppers swipe once before reading any text.
B. Add Images to Variants (Optional but Powerful)
If your product has variants (color, size, style):
- In the same product page, scroll to Variants.
- Click on a specific variant.
- Under Media, click Add media and upload or associate the correct angle or color.
- Save.
Now when a shopper selects a variant (e.g., “Black”), Shopify can automatically show the matching images/angles.
Step 3: Best Practices for Naming, Order & Alt Text
1. Image Order That Sells
A proven structure for your Shopify product gallery:
- Main hero angle – Clear front view on a neutral background.
- Lifestyle angle – Product in use / in context.
- Alternative angle – Back or side.
- Detail close‑up – Texture, material, labeling.
- Functional view – Product open/on/assembled.
- Size/scale shot – Next to a familiar object or on a model.
- Additional lifestyle angles – Variations in scene, usage.
2. SEO‑Friendly Image Alt Text
Alt text helps with both accessibility and SEO.
For each angle, describe what’s in the image and include relevant keywords naturally:
"Black leather crossbody bag front view on white background""Black leather crossbody bag back angle showing zipper pocket""Model wearing black leather crossbody bag over shoulder lifestyle shot"
Avoid keyword stuffing like: "bag bag bag leather bag best leather bag".
3. Consistent File Naming
While shoppers won’t see filenames, search engines do. Use logical filenames before uploading:
black-leather-crossbody-bag-front.jpgblack-leather-crossbody-bag-side.jpgblack-leather-crossbody-bag-on-model.jpg
Step 4: What If You Don’t Have Enough Product Angles?
This is where most Shopify merchants get stuck:
- You only received one basic photo from a supplier.
- Your photos are on random backgrounds that don’t match your brand.
- Shooting new angles with a photographer is expensive and slow.
You can fix this using AI‑powered product photography directly inside Shopify.
Turn One Photo Into a Full Gallery With Supra AI Photo Studio
Supra AI Photo Studio is a Shopify app that transforms a single plain photo into multiple professional angles and scenes in minutes.
You can:
- Remove or replace backgrounds to match your brand.
- Place products in lifestyle environments (kitchen, office, street, outdoors…).
- Generate UGC‑style and b‑roll videos to add motion to your product pages.
- Auto‑enhance & upscale low‑quality supplier photos.
- For fashion: use AI Try‑On to put products on realistic models from different angles.
Explore the app here: Supra AI Photo Studio on the Shopify App Store
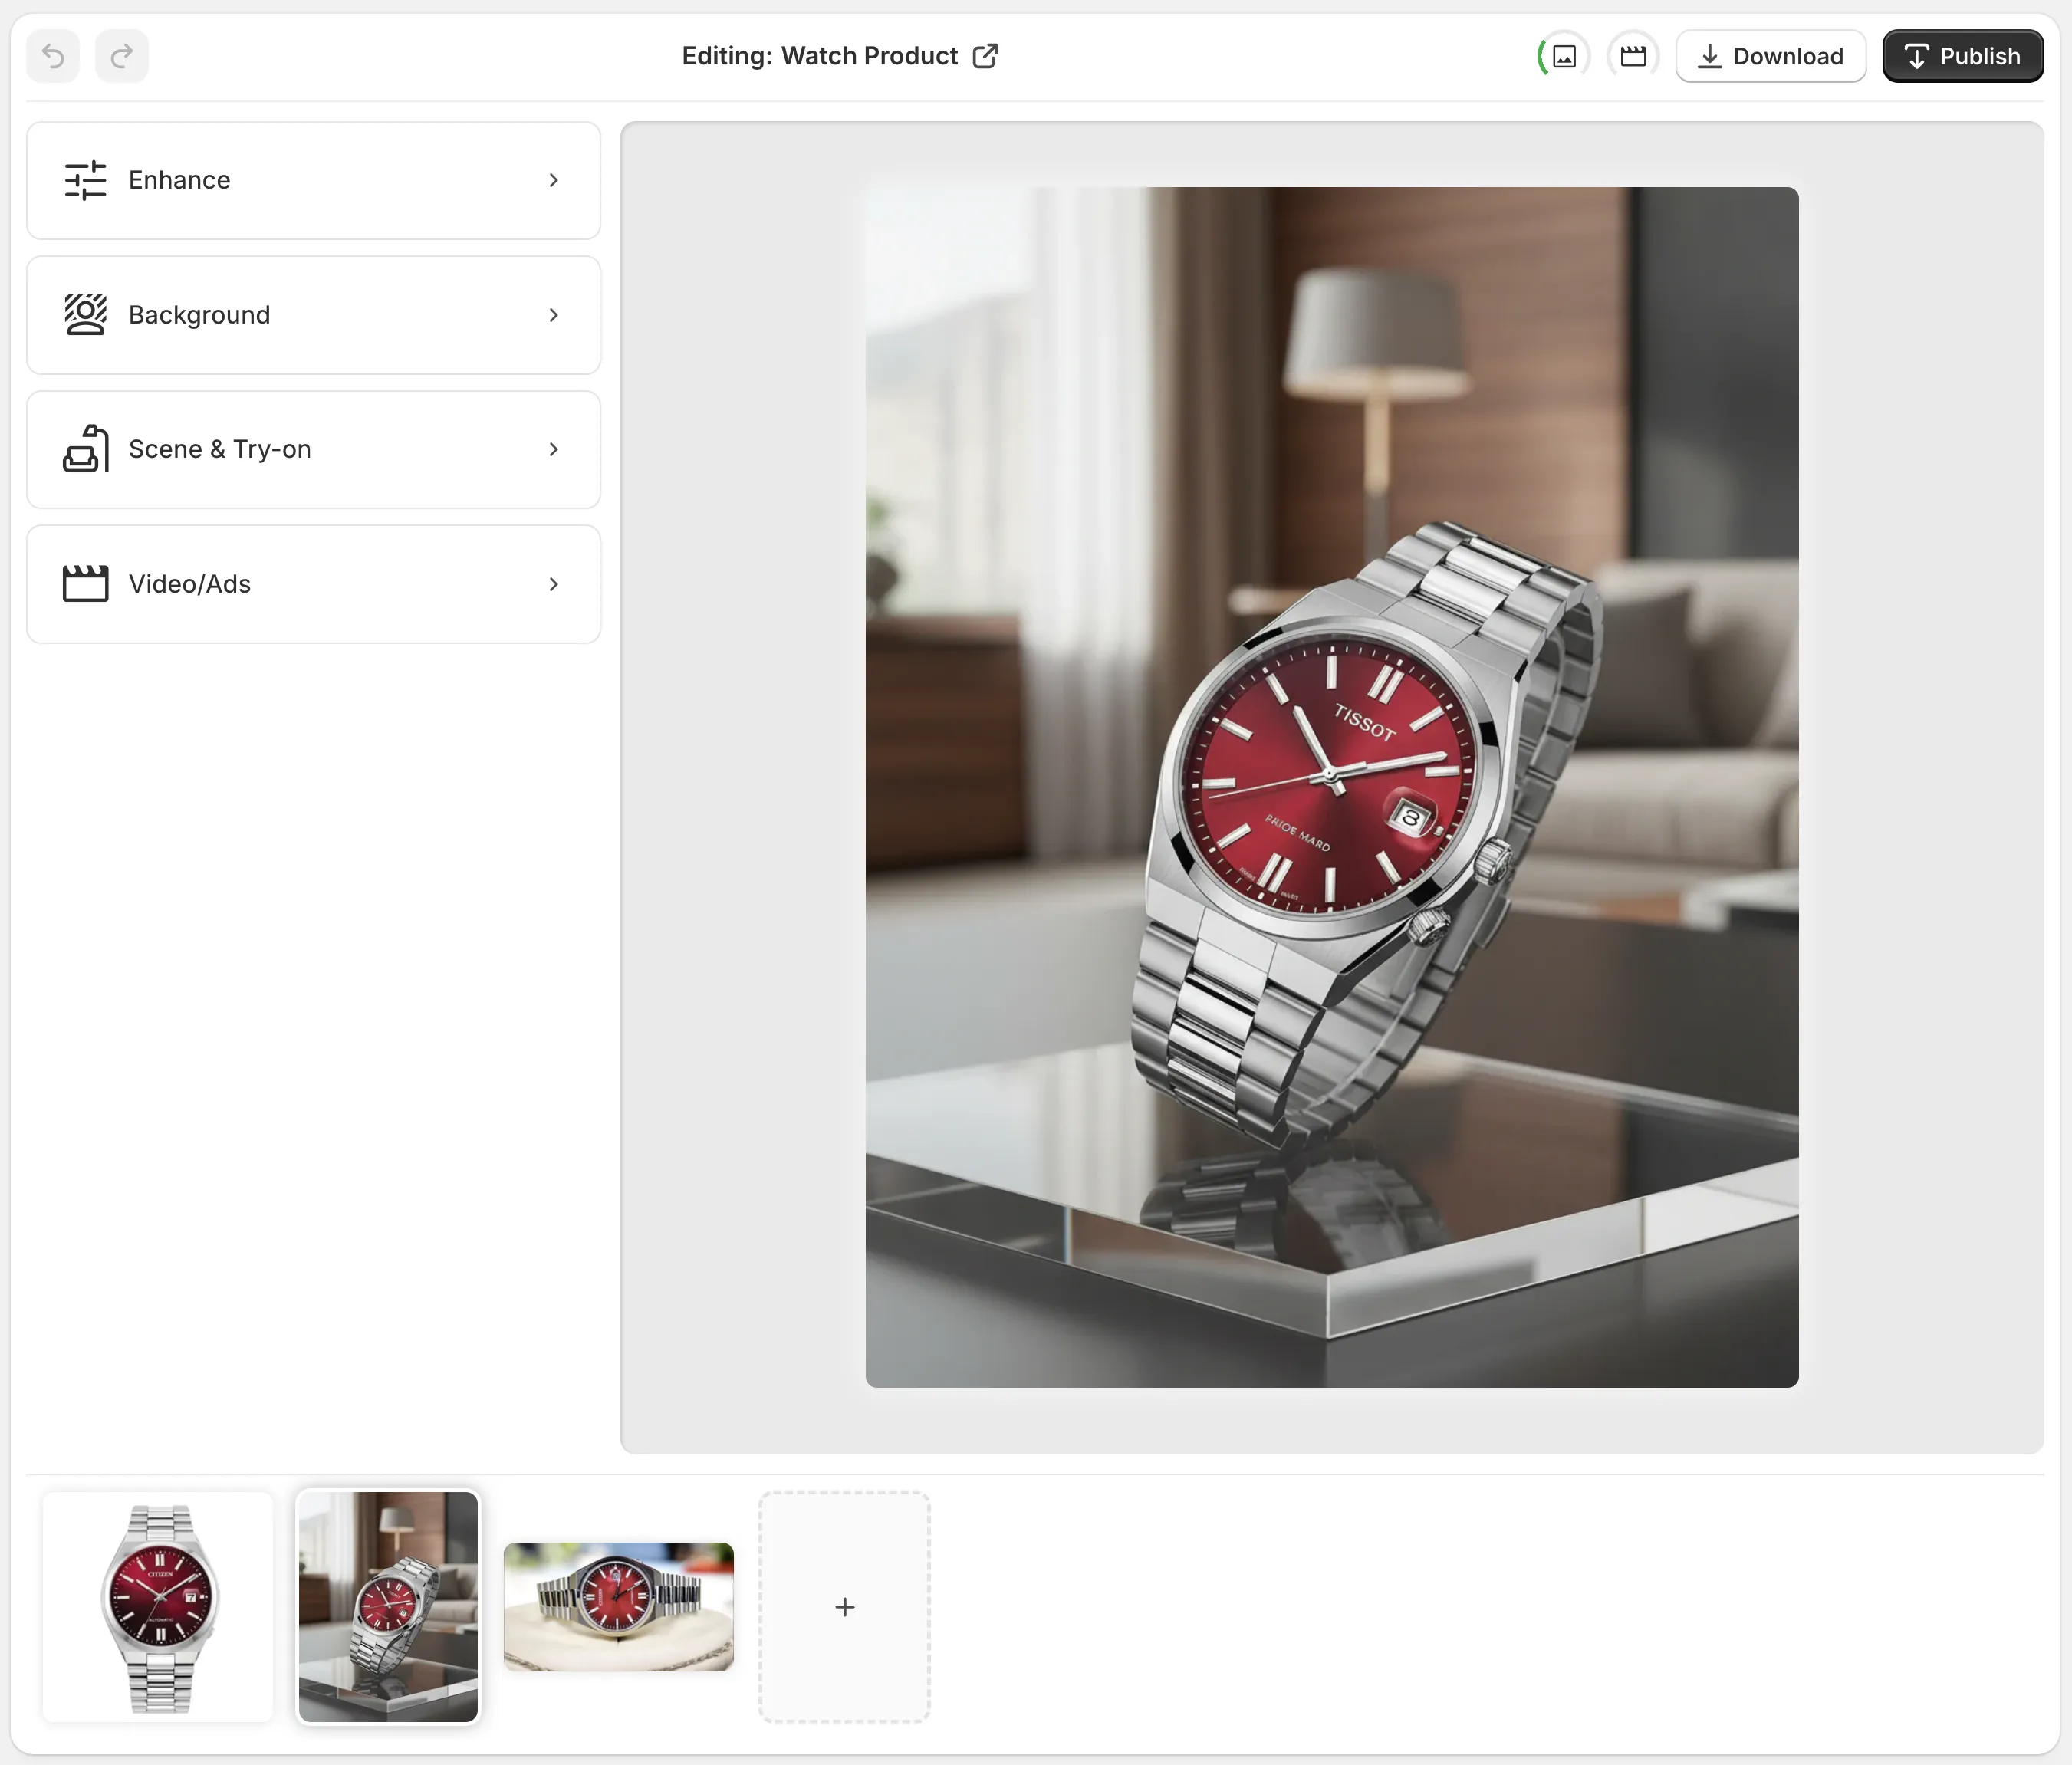
Step 5: Creating Extra Angles With Supra AI Photo Studio
Here’s a simple workflow to turn basic shots into a multi‑angle, conversion‑optimized gallery.
1. Install the App
- Go to the Supra AI Photo Studio listing.
- Click Add app and install it on your store.
- Open it from your Shopify admin.
2. Load Your Product Image
Inside the app:
- Choose a product from your catalog or upload an image directly.
- The editor will show your image on the canvas, with tools on the left and product images at the bottom.
3. Isolate the Product
For best AI results:
- Use the Isolate Product / Background Remover tool.
- Let the AI cut out the product and remove distractions.
- This clean cutout becomes the base for new angles and scenes.
4. Generate Lifestyle & Context Angles
Use Object Placement to create multiple “angles” and contexts:
- Place the product on different surfaces (wood table, marble countertop, office desk).
- Choose camera angles: top‑down, 45°, eye‑level.
- Pick lighting styles: soft studio, daylight, dramatic, etc.
You can quickly build a gallery like:
- Top‑down shot on a desk.
- 45° angle on a marble kitchen counter.
- Straight‑on hero shot on a clean background.
- Lifestyle shot next to complementary items.
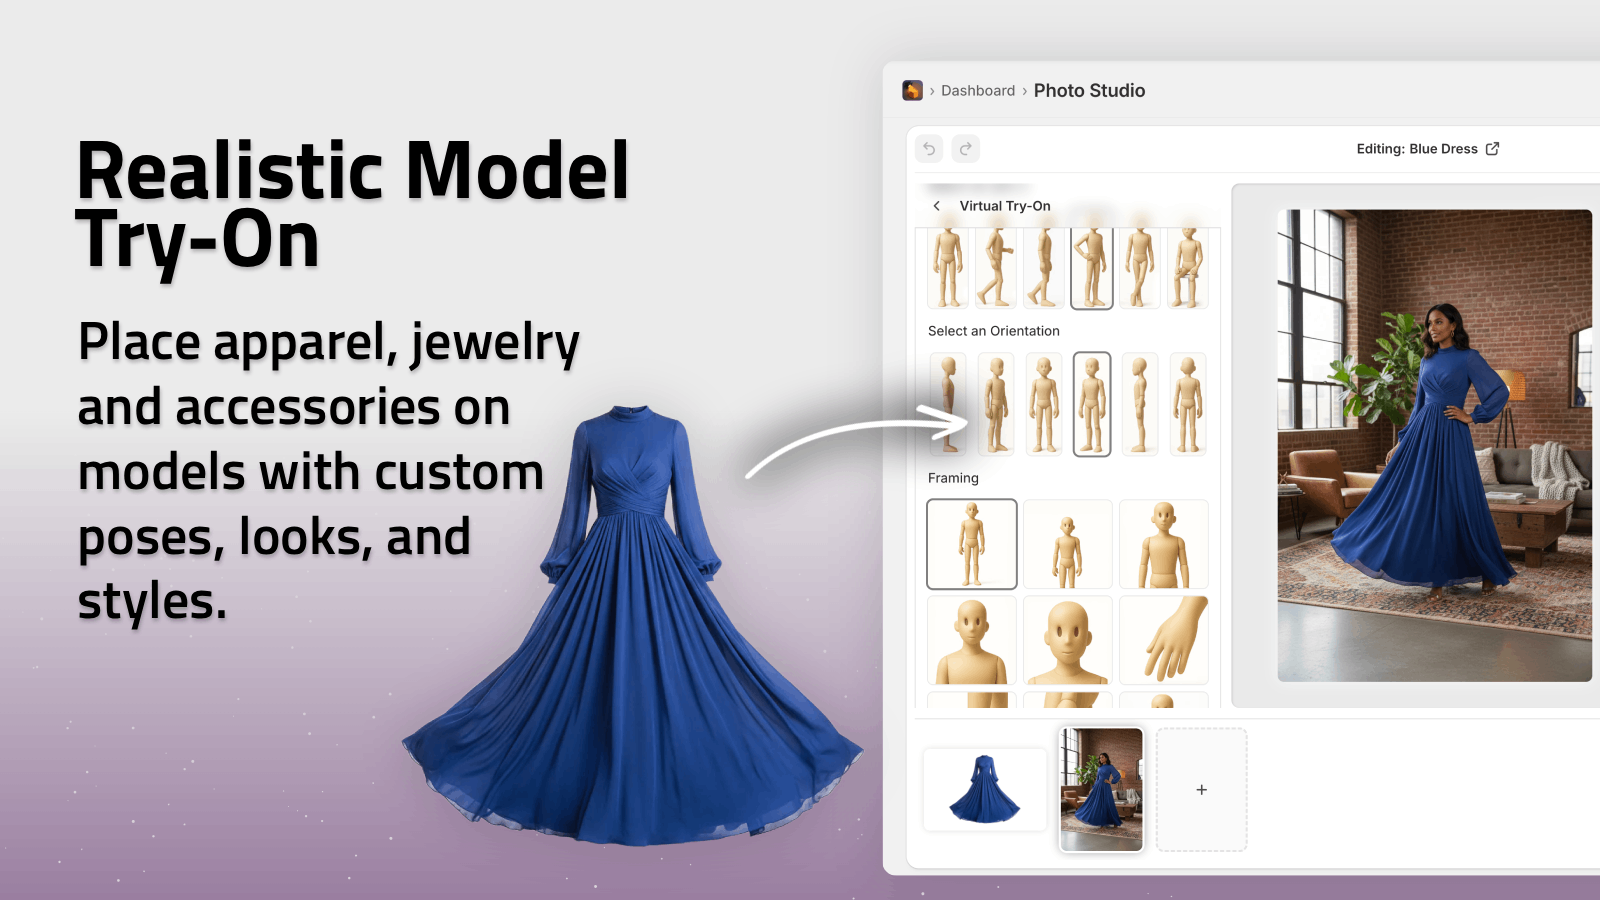
5. Add Model Try‑On Angles (Fashion Stores)
If you sell apparel, jewelry, or accessories:
- Use AI Try‑On to place your product on realistic models.
- Choose model pose, skin tone, body type so you represent your audience.
- Generate multiple angles: front, side, 3/4 view.
These instantly become high‑value gallery images next to your basic flat lay.
6. Enhance, Upscale & Standardize
Use Supra AI Photo Studio’s auto‑enhance tools to:
- Fix poor lighting and color.
- Sharpen blurry images.
- Upscale small images to high resolution.
This keeps all angles consistent, which is crucial for a professional, branded feel.
Once you’re happy, simply publish the generated images back to your Shopify products from inside the app.
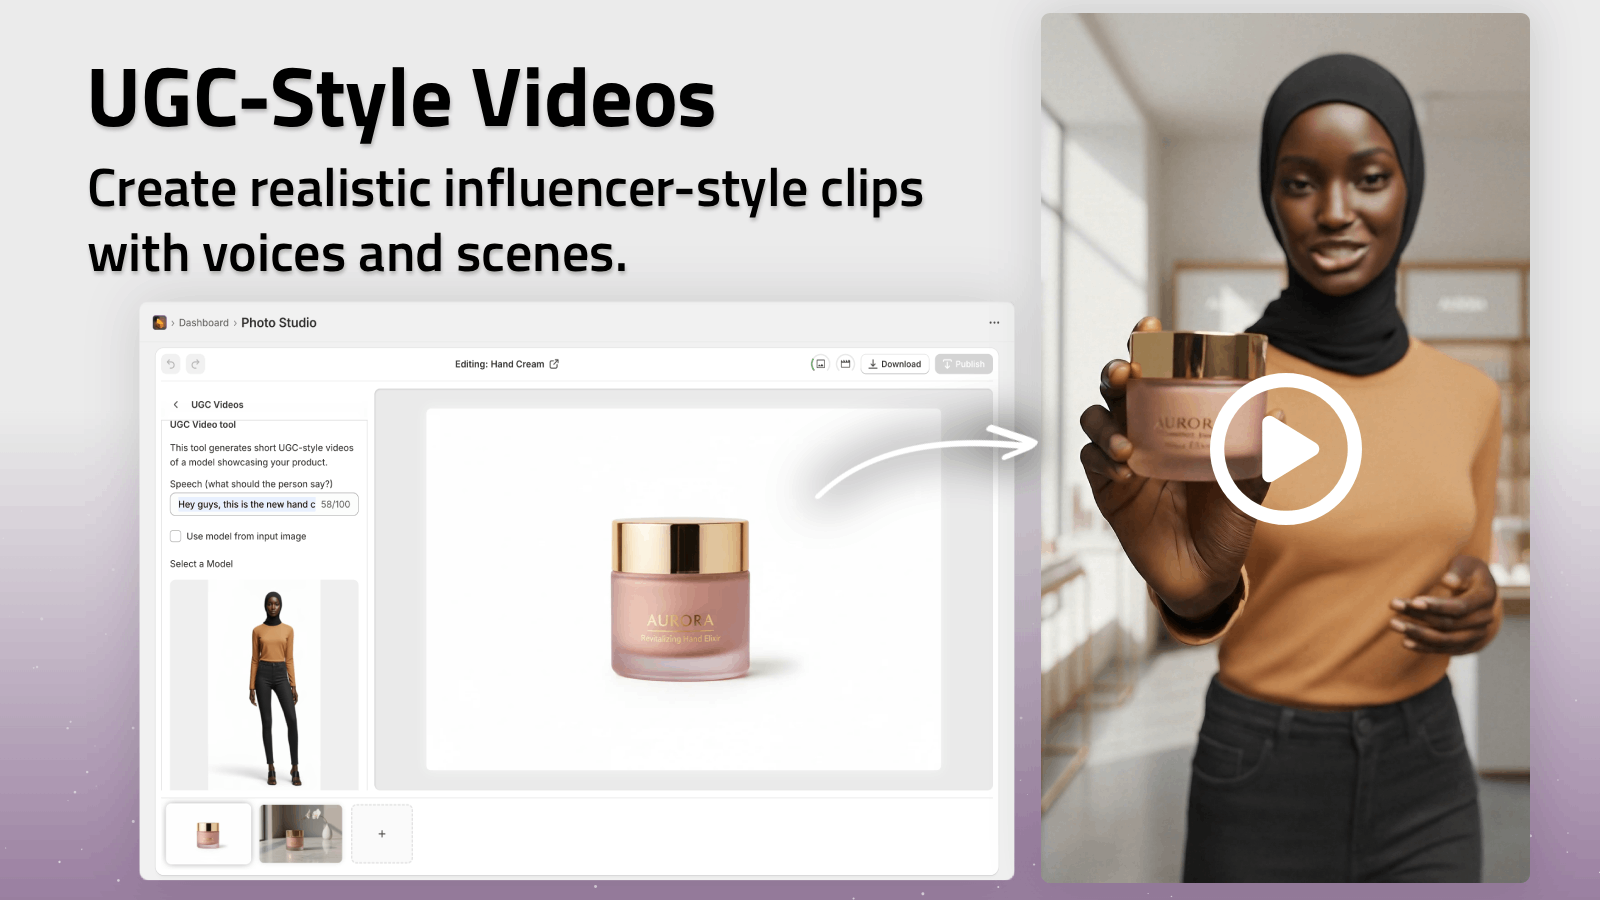
Step 6: Use Video & B‑Roll as Extra “Angles”
Don’t stop at photos. Short video clips behave like dynamic angles of your product.
With Supra AI Photo Studio, you can:
- Generate UGC‑style videos from a single image.
- Create cinematic b‑roll (product spins, drops, slow‑motion reveals).
These can be added to the Media section of your Shopify product, just like images, and massively increase engagement.
Watch a quick demo: Supra AI Photo Studio Trailer
Step 7: CRO Tips for Using Multiple Angles Effectively
Once you’ve added and created your angles, optimize them for conversions:
-
First image must stop the scroll
- Clean, bright, no clutter.
- Product centered and clearly visible.
-
Show real‑world use within first 3 images
- Lifestyle angle or model try‑on.
-
Answer objections visually
- Worried about size? Show a scale reference.
- Worried about quality? Show close‑ups of stitching or materials.
-
Keep style consistent across catalog
- Same aspect ratio (e.g., square 1:1).
- Similar background tones.
- Similar lighting.
This consistency is easy to achieve using Supra AI Photo Studio because you can generate and edit all images inside one AI‑powered editor.
Putting It All Together
To recap, here’s your quick action checklist:
- Upload multiple product angles in the Shopify Media section.
- Reorder images so hero → lifestyle → detail → scale.
- Add variant‑specific images where relevant.
- Write descriptive, keyword‑rich alt text for each angle.
- Use Supra AI Photo Studio to:
- Isolate products and clean up backgrounds.
- Generate lifestyle scenes and on‑model images.
- Enhance, upscale, and standardize your gallery.
- Add UGC & b‑roll videos as dynamic angles.
With the right setup, every Shopify product page becomes a mini showroom — giving shoppers all the visual proof they need to buy.
Start with a few key products, transform their visuals, and watch how better product angles improve clicks, time on page, and ultimately, sales.